CLIMBING MOUNT FUJI OFF THE BEATEN PATH - SUBASHIRI & PRINCE ROUTES
If you want to make the most of your Mount Fuji climbing experience and avoid the crowds, consider taking less-travelled routes. The Subashiri Trail and the Prince Route are not only less popular, and thus less crowded, but they also provide a more diverse hiking experience in terms of scenery and natural beauty. Read this article for more details on climbing Mount Fuji without the crowds.
2026 UPDATE – NEW RESTRICTIONS & NO BULLET CLIMBING
According to Japan’s Ministry of the Environment, 205,100 people climbed Mount Fuji during the 2025 summer season. Despite the introduction of a climbing fee and stricter regulations, visitor numbers remained compared to the previous year. As before, more than 60% of climbers used the Yoshida Trail.
To reduce overcrowding and improve safety, the following rules apply:
A daily limit of 4,000 hikers on the Yoshida Trail. However, there is no need to worry too much—this limit was not reached on any day during the 2024 or 2025 climbing seasons.
A mandatory climbing fee of ¥4,000 per person on all four trails. You can make the payment through the online reservation system either at the reception desk on the day of your climb.
All four trails are closed from 2:00 PM to 3:00 AM to hikers without a mountain hut reservation. This measure is designed to prevent “bullet climbing”—attempting to reach the summit overnight without proper rest. Only hikers staying in mountain huts may continue climbing during these hours to watch the sunrise from the summit.
For 2026, the rules on the Yoshida Trail have been further clarified. All hikers will be checked at the trailhead for three essential items: proper hiking boots, warm clothing for cold weather and rain gear. Hikers who are not adequately equipped may be denied access to the trail.
What's in this blog post?
I. MOUNT FUJI WITHOUT THE CROWDS: SUBASHIRI & PRINCE ROUTES
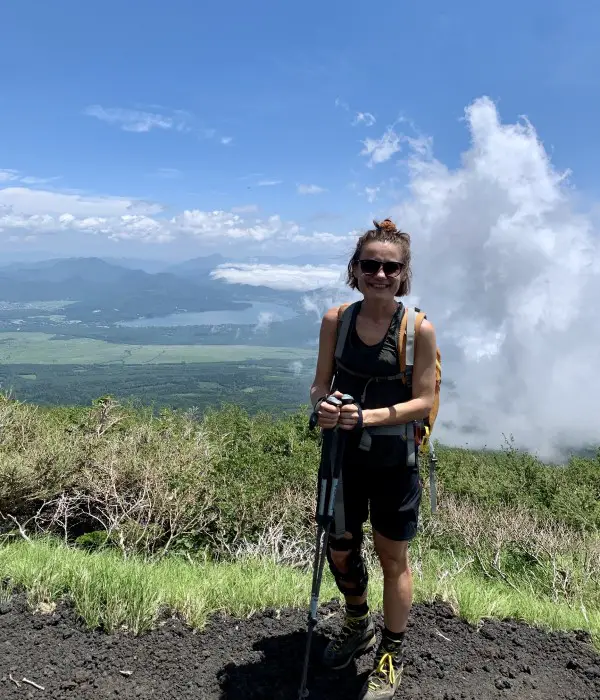
It was my third ascent of Mount Fuji. The route I was about to take was the final section of the Mount Fuji trail network that I had not yet explored. It was like a missing puzzle piece. Upon completing it, I would finally know which is the best trail for a 2-day Mount Fuji climb. I wanted to find out which route offers the most interesting scenery while being the most enjoyable in terms of avoiding crowds and fatigue.
I had previously climbed Mount Fuji twice: once during the off-season via the Fujinomiya (blue) trail, and another time from the bottom via the Yoshida (yellow) traditional pilgrim’s route. During that ascent, I descended via the longest Gotemba (green) trail.
The Subashiri (red) trail remained the last unexplored Mount Fuji trail. On my descent, I planned to hike the Prince Route, which connects the two standard trails, Gotemba and Fujinomiya, by traversing the spectacular crater of Mount Hōei located on the southeastern side of Mount Fuji. Here is a full story of my hike.
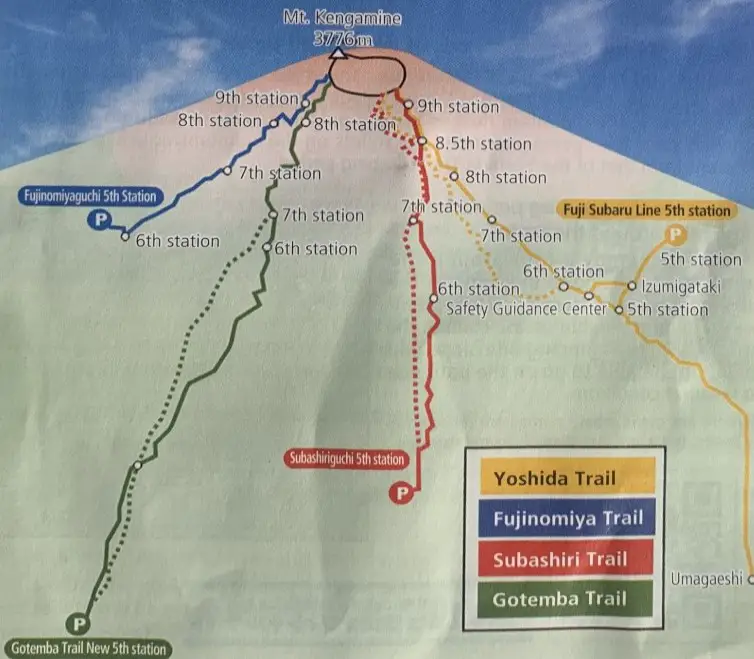
Mount Fuji Official Trails network
Everyone has different hiking experiences and expectations. Additionally, each of you has a unique schedule and travel plans. For those with limited mountain experience, the Yoshida Trail might be the best choice, while those with little time might opt for the Fujinomiya Trail. Therefore, honestly speaking, there isn’t a single best trail for climbing Mount Fuji.
That being said, having climbed Mount Fuji three times and explored all its trails, I believe the Subashiri Trail combined with the Prince Route to descend offers the most comprehensive Mount Fuji experience for those undertaking a 2-day hike. Here are ten reasons why.
Why you should climb Mount Fuji via the Subashiri Trail?
1. A perfect balance of peace, nature and convenience while hiking
The Subashiri Trail is less crowded compared to the highly popular Yoshida Trail, providing a more enjoyable hiking experience. You will be able to focus on beautiful nature rather than on other hikers. Less than 1 in 10 hikers opt for the Subashiri Trail. In 2019, approximately 150,000 climbers chose the Yoshida Trail (64% of total climbers), whereas only 20,000 chose the Subashiri Trail (only 9%). 2023 figures look very similar.
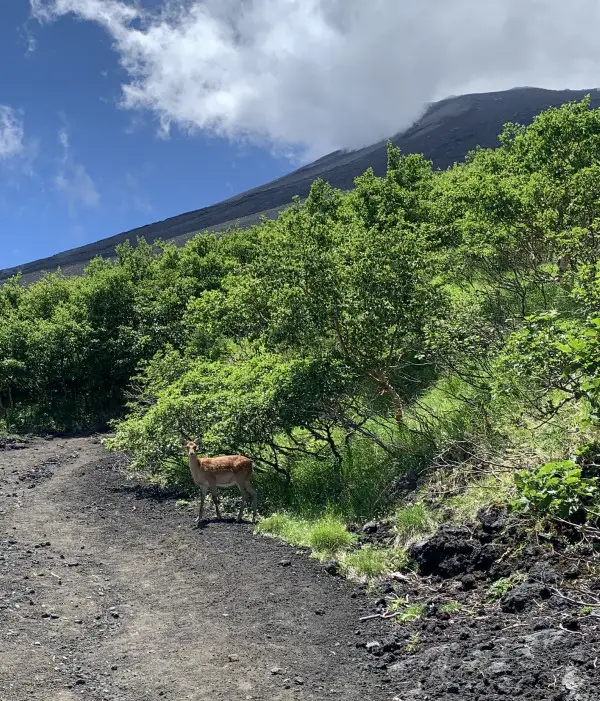
I would have never expected to encounter a wild deer on Mount Fuji slopes, but yet on the Subashiri Trail it happened, which is proof of how peaceful it can be. On the other hand, the Subashiri Trail features more mountain huts along its route compared to the Gotemba and Fujinomiya trails, which makes hiking easier. Particularly when the weather or your physical condition 😉 is not so great. For me, it strikes a perfect balance.
2. Experience what makes Mount Fuji climb so unique
The Subashiri Trail merges with the Yoshida Trail at the 8th Station, and this is when it becomes much busier. This means you will experience the famous Mount Fuji crowds and witness hundreds of hikers lining up in darkness, hoping to reach the summit in time for Japan’s most iconic sunrise. To some extent, these crowds make Mount Fuji climb so unique. I always repeat that those seeking a peaceful hike in pristine nature should rather choose a different mountain. There are plenty of summits and trails in Japan where you hardly encounter anyone. Mount Fuji climb offers a completely different hiking experience.
3. Enjoy Japan’s most iconic sunrise without time pressure
Just like the Yoshida Trail, the Subashiri Trail also approaches the summit from the eastern side. This means that even if you can’t reach the summit in time, you can still enjoy a splendid sunrise view from the lower sections of the trail. Furthermore, if you want to avoid the biggest crowds, you can witness the sunrise from the 8th Station, and only after the spectacle head to the top.
4. The Subashiri Trail is not too challenging
The Subashiri Trail is not particularly challenging. It is slightly more demanding than the Yoshida Trail due to an additional 300 metres of altitude gain, but it is significantly shorter than the strenuous Gotemba Trail and less steep than the Fujinomiya Trail.
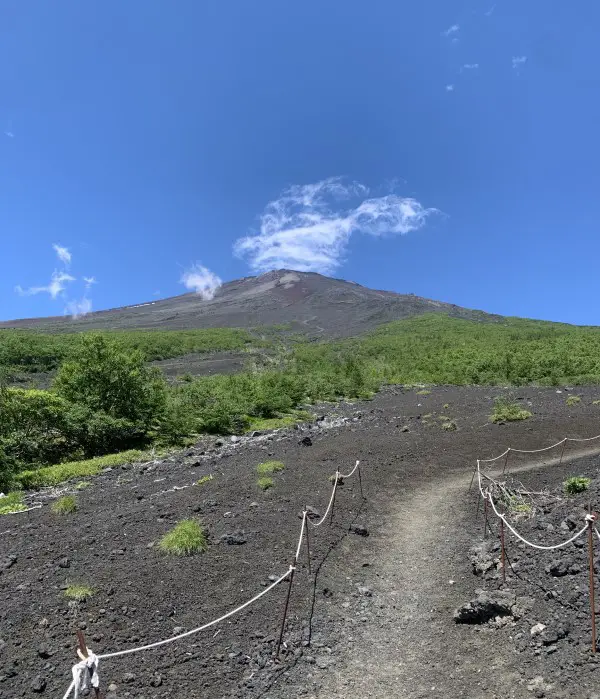
5. The picturesque trail & unique scenery
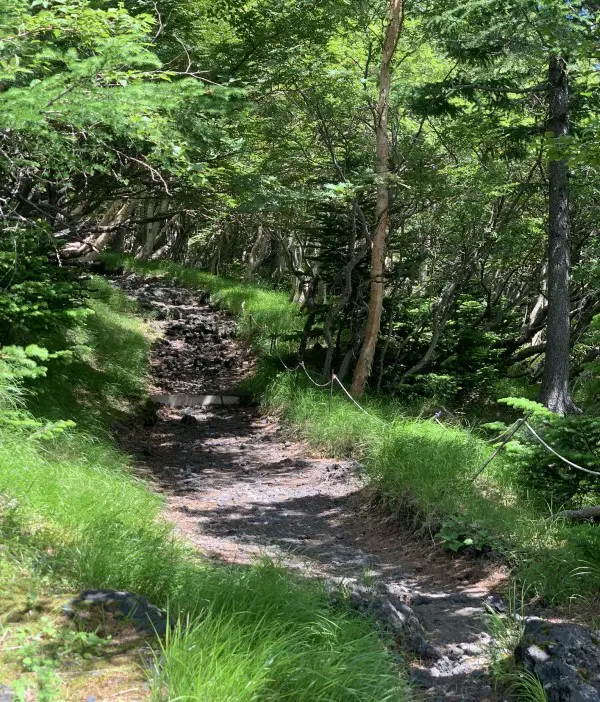
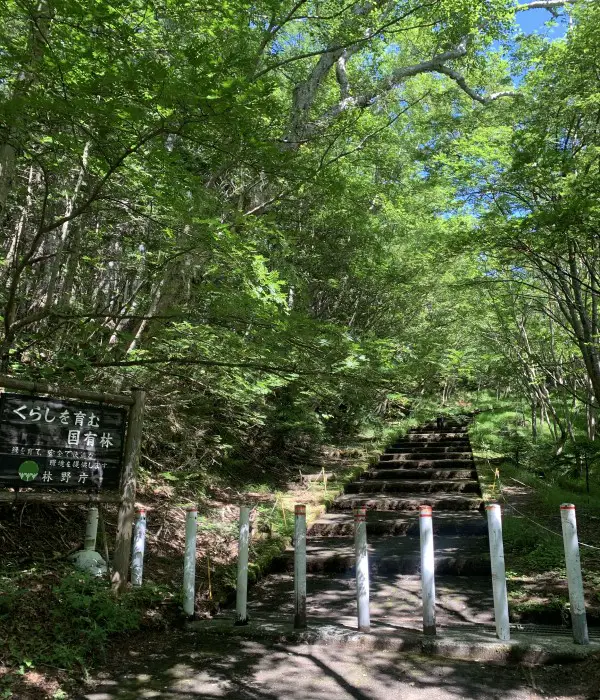
The Subashiri Trail begins at an elevation of 2,000 m. During the initial part of the climb, you walk in the shade through a beautiful forest, which makes for a pleasant hike on a hot day. No other trail offers forest scenery unless you decide to start climbing from the base of Mount Fuji, which brings me to my next point.
The Subashiri (red) Trail
If you are interested in learning more about Mount Fuji’s intriguing climbing history, consider visiting the shrine where it all began and follow the footsteps of ancient pilgrims. If you can allocate three days instead of two for climbing Japan’s most sacred mountain, you might want to consider climbing the entire Mount Fuji (rather than just its half) by starting from the mountain’s base via the Yoshida Trail.
Why you should descend Mount Fuji via the Prince Route?
1. Escape Mount Fuji's crowds
Although the Prince Route is very picturesque and not particularly challenging, it remains less popular among hikers. Nevertheless, as you descend, you will come across other people and mountain huts where you can take breaks, making it, in my opinion, an optimal route for descent.
2. Follow the footsteps of the Emperor of Japan
Emperor Naruhito climbed this trail on his first ascent in 2008 when he was still the Crown Prince of Japan and therefore the route’s name. If the Emperor has chosen this path, it can’t be a bad choice, can it? 🙂 To tell the truth, I wouldn’t recommend this route for your ascent as the volcanic gravel around Mount Hoei is quite a difficult surface for climbing. Said that, it is perfect for a quick and smooth descent.
3. Run down the slopes of Mount Fuji on the “The Great Sand Run”
The volcanic gravel might not be great for ascending, but it makes going down easy and fun. Taking long steps, you don’t even need to run, allows you to cover distances that take ages to hike up in just minutes! “The Great Sand Run” constitutes a large part of the Gotemba trail, and if you take the Prince Route, you will be able to experience a portion of it.
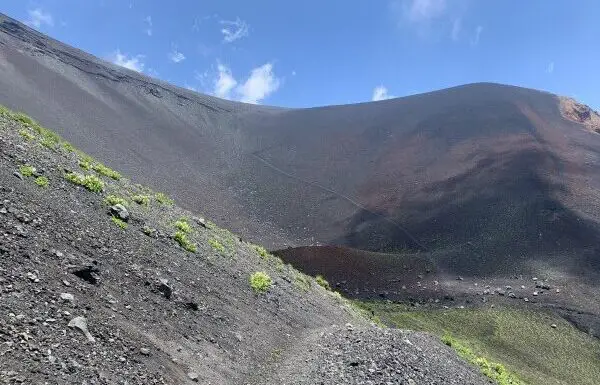
4. Explore the less visited, second crater on Mount Fuji
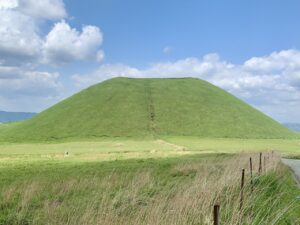
The crater of Mount Hōei (2,693m) was formed as a result of Mount Fuji’s last eruption in 1707. From its summit, which is only a short 5-minute detour from the Prince Route, you will be able to enjoy the breathtaking majesty of Mount Fuji.
5. Easy return to civilization, that is, to any city in Japan
During the descent, the final stretch of the Prince Route merges with the Fujinomiya Trail. The 5th Station of the Fujinomiya Trail features direct buses heading to Shin-Fuji and Mishima shinkansen train stations. If your post-Mount Fuji plans involve travelling west (e.g. Kyoto, Osaka, or Hiroshima), descending to Fujinomiya 5th Station provides the highest convenience due to the excellent train connection with the western part of Japan.
However, if your journey takes you back to Tokyo, going back to civilization remains equally hassle-free. The trip from Fujinomiya 5th Station to Shin-Fuji train station requires around 2.5 hours, and from there, it’s just a one-hour shinkansen ride to Tokyo.
The Prince Route
What if you have to descend the same trail to pick up the luggage?
If you need to pick up your belongings in Gotemba Station, instead of taking the Prince Route, take a longer and also interesting Gotemba Trail down. There are direct (unfortunately not very frequent) buses from Gotemba 5th Station to Gotemba Station, where you started your Mount Fuji climb the day before.
Of course, you can always take the same route down. However, it is always more exciting to explore a new path. Plus, you will get to know Mount Fuji from a slightly different perspective 🙂
Shipping services to send your luggage in Japan
You can also use Japan’s reliable shipping service called “takkyubin” to ship your luggage to your next destination before climbing Mount Fuji. Companies like Yamato Transport (with the black and yellow cat logo) offer fast and cheap shipping services. Unless you are travelling to more remote parts of Japan such as Hokkaido or Okinawa, they will deliver your bags overnight.
II. MOUNT FUJI WITHOUT THE CROWDS: THE STORY OF MY HIKE
The night before the climb
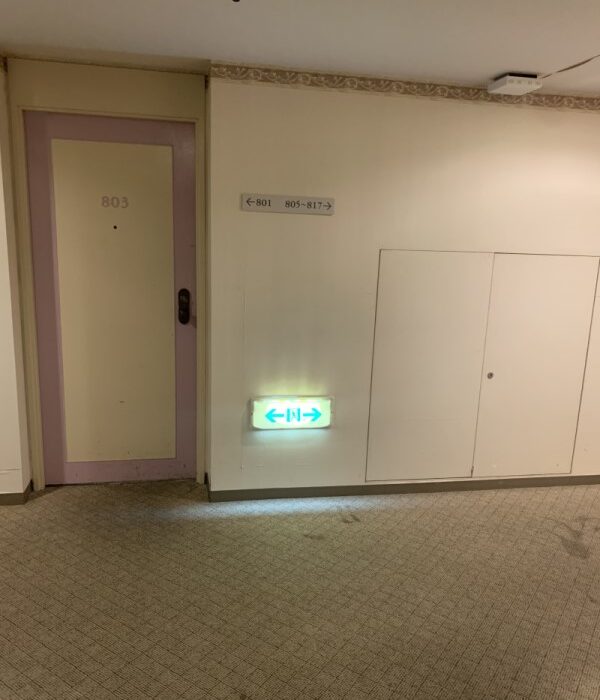
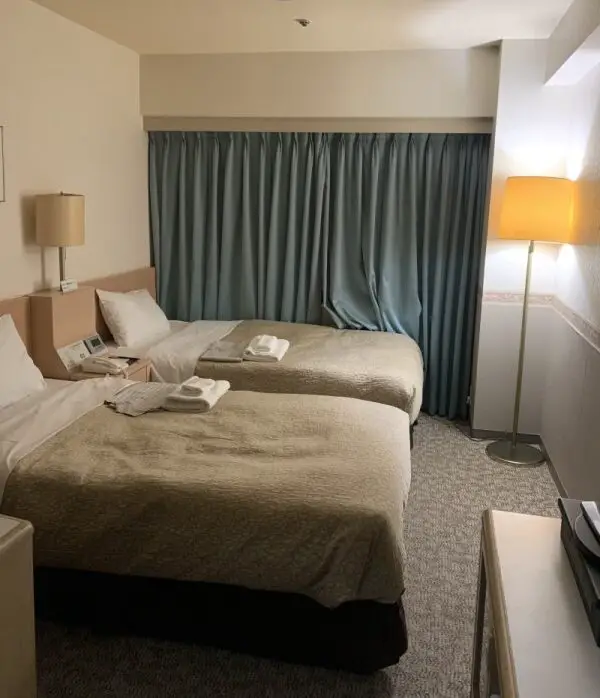
I spent the night before climbing in Gotemba so that I could catch the first morning bus to the 5th station on the Subashiri trail, which is its starting point. I chose Hotel Gotenbakan strategically located opposite the train and bus stations. Although the hotel itself is a bit old and the corridors are a bit spooky, it is affordable (JPY 7,000 for a single room) and most importantly, I was able to get a good amount of sleep before my climb, because it couldn’t be closer to the bus stop.
The old, dirty & a bit scary corridor and a clean, cozy & also old room 🙂
Although I did not ask, I believe you can store your luggage at the hotel, if you plan to return to Gotemba Station after the climb to continue your travel across Japan. Alternatively, there are lockers at Gotemba Station.
Welcome to Gotenbakan Hotel!
DAY 1. Climbing Mount Fuji via the Subashiri Trail: 5th Station (2,000m) > 8th Station (3,400m)
Getting from the Gotemba Station to the Subashiri 5th Station
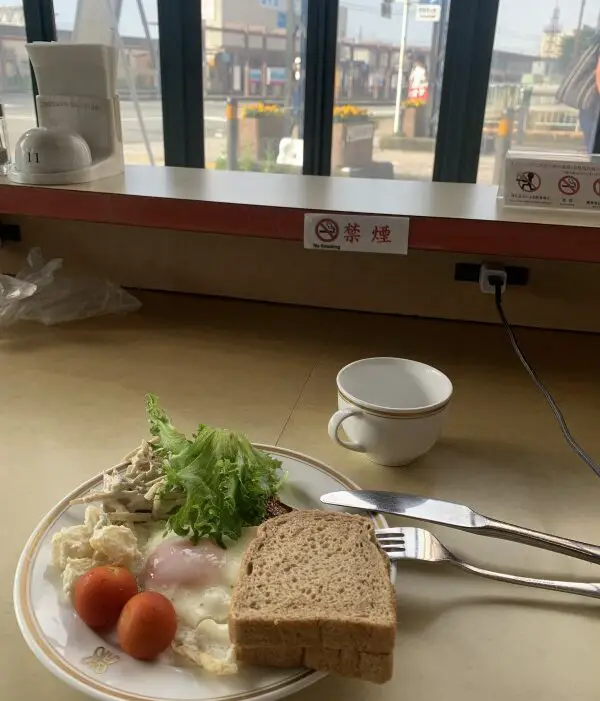
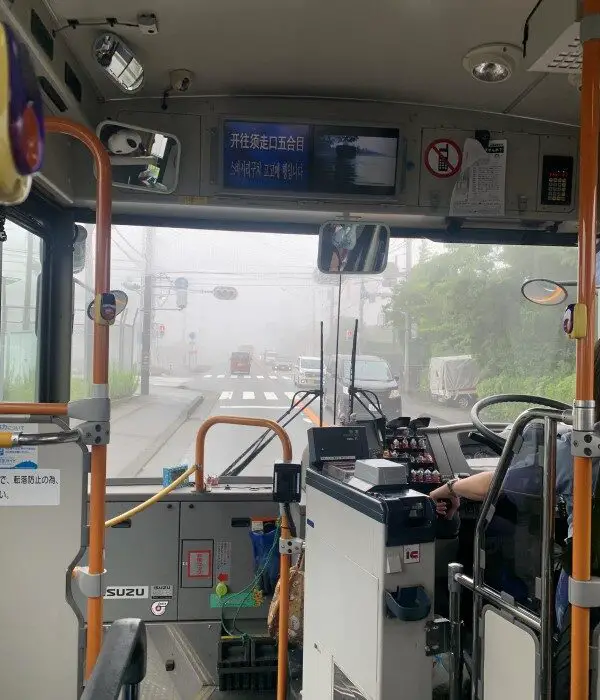
The alarm went off at 6:30. After a quick shower and the hotel breakfast, served from 7:00, I easily caught the first bus at 7:35.
Despite a good weather forecast for Mount Fuji, the conditions around Gotemba weren’t very promising with rain and fog. By the way, it’s quite common there, so don’t worry if your day also starts this way. However, when the bus arrived at Subashiri 5th Station at exactly 8:35 AM, the sky had cleared and was as blue as only mountain skies can be.
The beginning: breakfast with the view of the bus stop (just perfect!) & not a very promising weather (not perfect at all...)
To my surprise, the bus wasn’t a long-distance coach with comfortable seats, but a regular city bus. Due to limited seating, some passengers had to stand for the hour-long journey. Tickets can be purchased at the bus stop or paid for using your PASMO/SUICA card. Unfortunately, seat reservations are not an option.
Hello old friend 😉
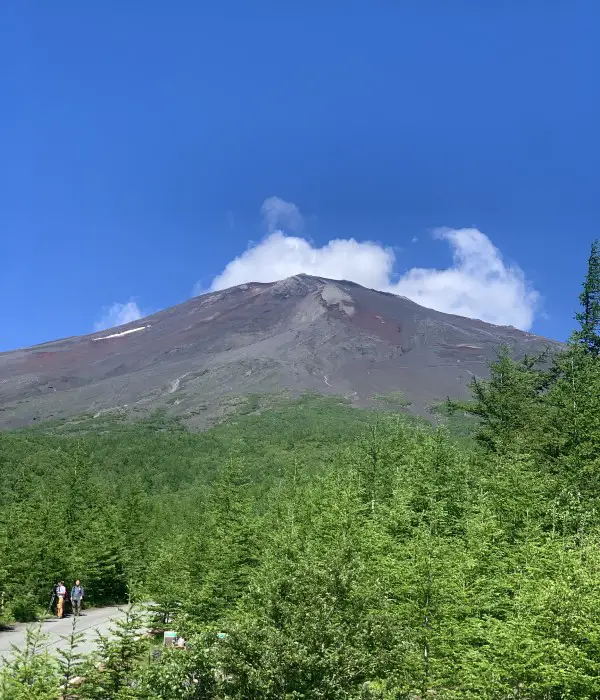
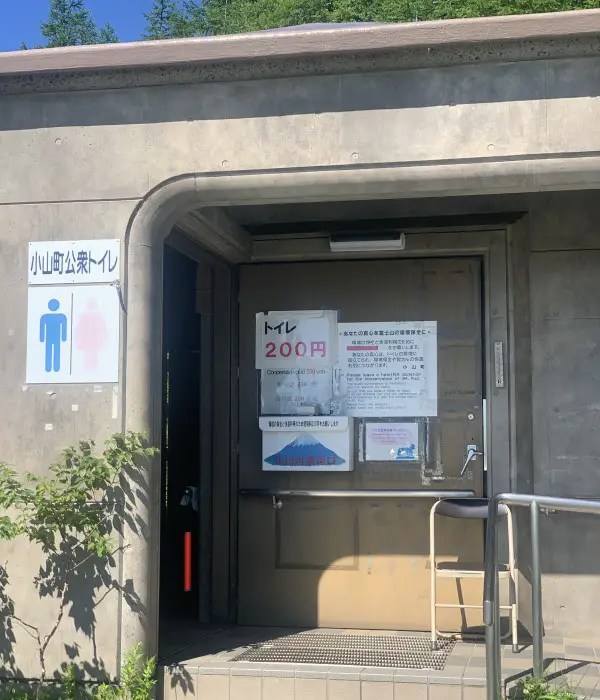
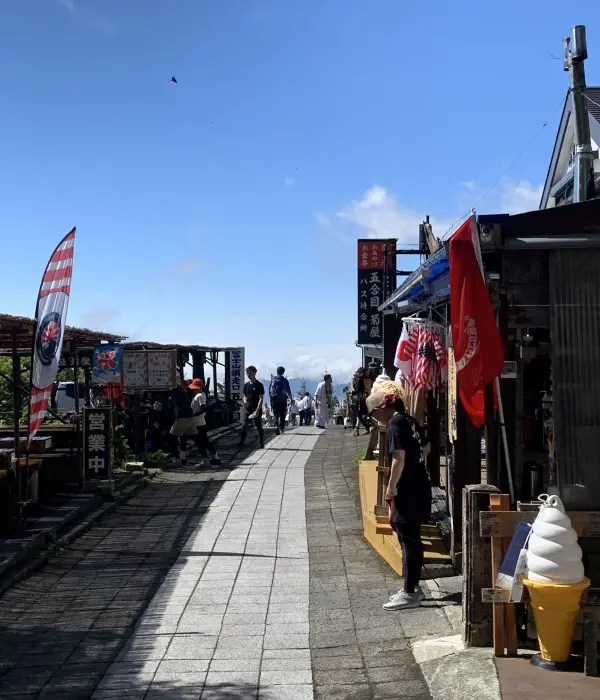
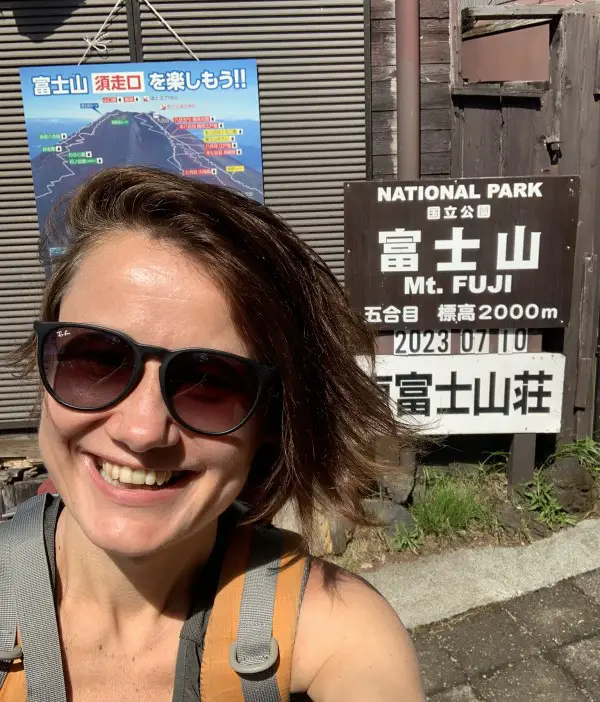
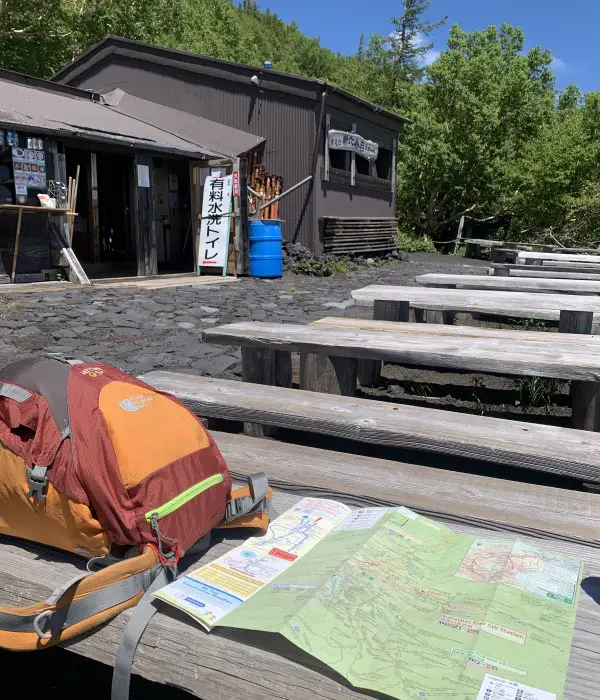
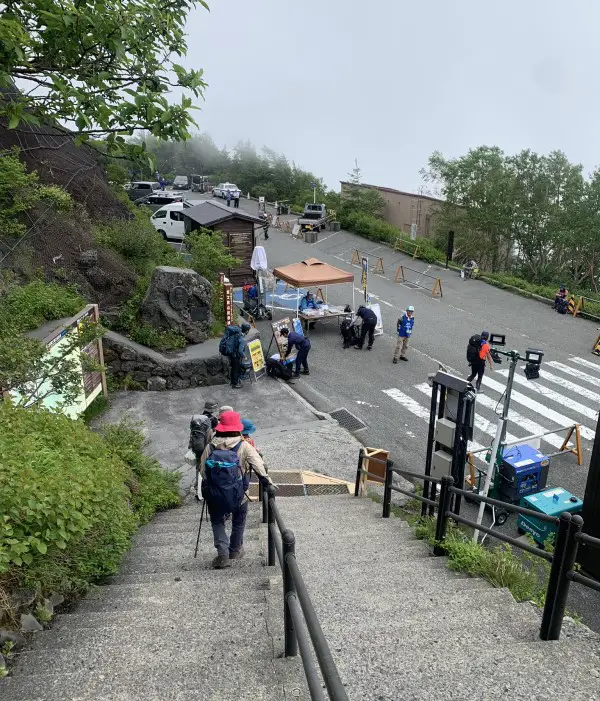
At the Subashiri 5th Station
The Subashiri 5th Station, located at 2,000 meters, is less developed than the Fuji Subaru Line 5th Station, the main starting point for hikers on the Yoshida Trail. However, it offers everything you need, including restrooms, small shops selling snacks, souvenirs, and hiking gear, as well as several restaurants.
There is also a new information center, which officially opened on the day of my climb. I started my ascent on July 10, the first day of the official climbing season on the Subashiri Trail.
2026 Update
In a change from previous years, the Subashiri Trail is scheduled to open on July 1, the same day as the Yoshida Trail, with which it merges near the summit. The Fujinomiya and Gotemba trails, however, will remain closed until July 10.
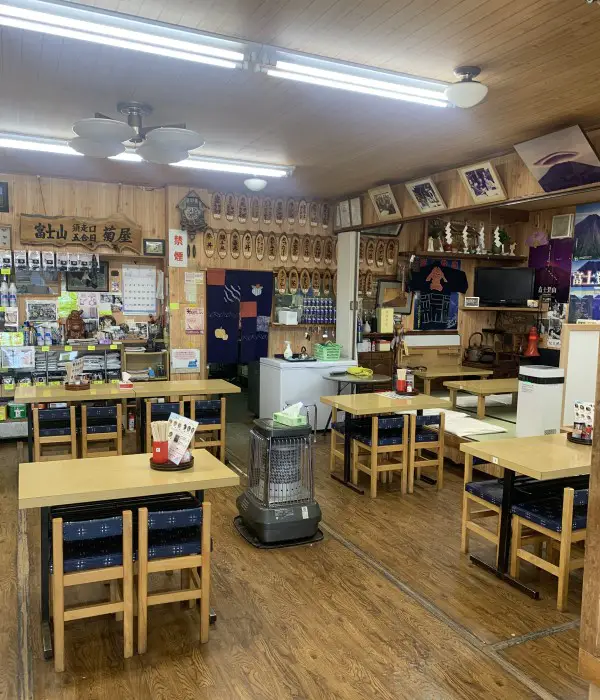
Life on the Subashiri 5th Station - that's really all you need
Without rushing, I checked the shops, paid 1000 JPY Mount Fuji entrance fee at the checkpoint, and at 9:10 AM hit the trail.
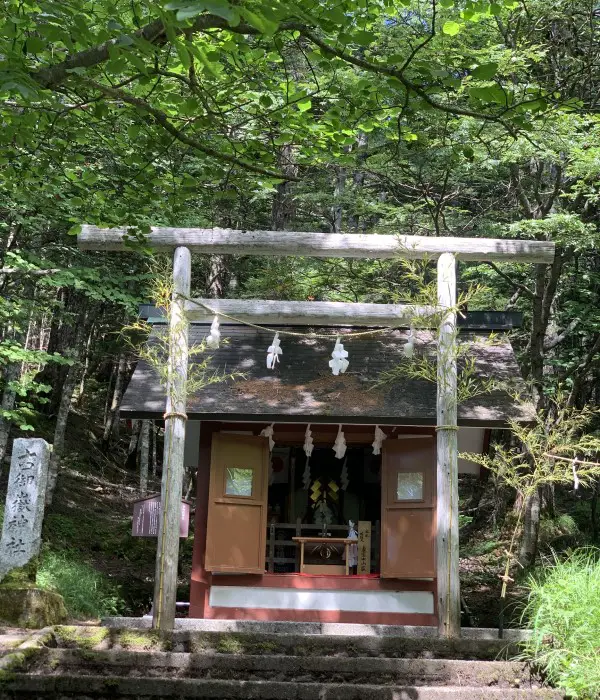
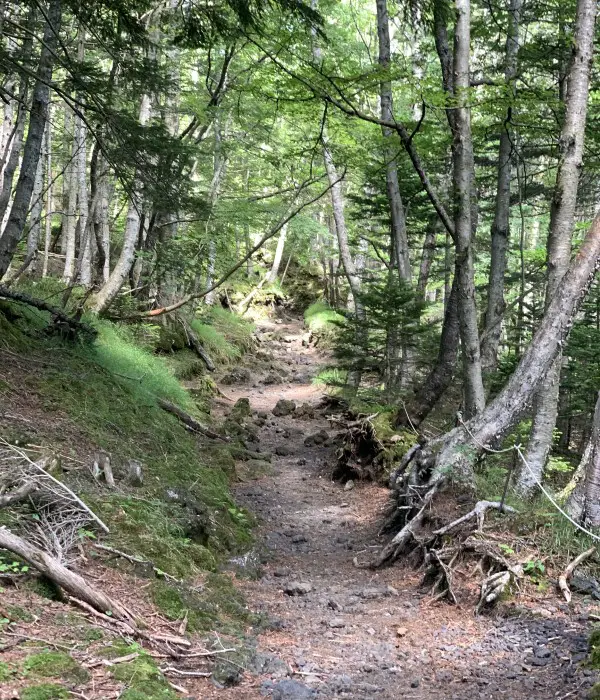
Hiking through the forest
At the beginning of the trail, which leads through a beautiful forest, a small shrine Komitake Jinja is located. I met very few people on my way and only heard birds and the rustle of leaves in the wind. Before this climb, many thoughts were spinning in my head “why I shouldn’t go.” My mind was telling me to stay home, but something deep inside screamed “go.” After just a few minutes on this peaceful trail, I felt incredibly confident and happy about my decision.
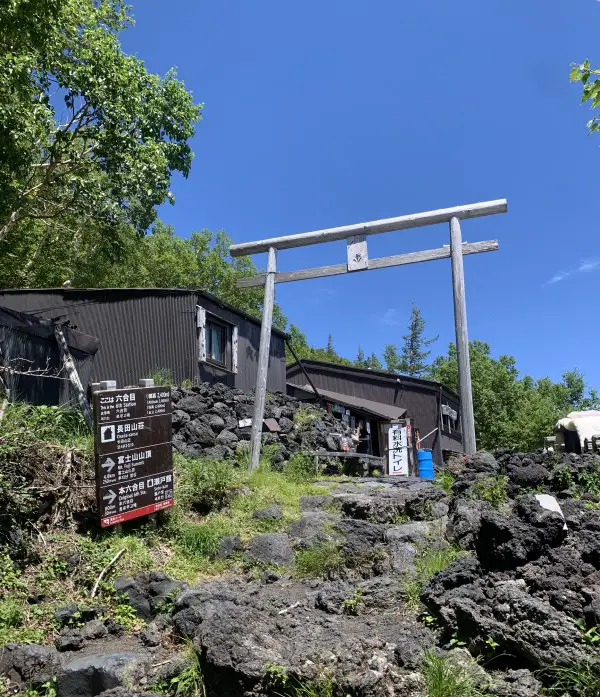
After hiking for 90 minutes, I reached the 6th Station at 2,400 m, where I took a pretty long half-hour break. I had the opportunity to practise my lame Japanese by talking, or rather listening to the owner of the hut. I understood about 50% of his words – not bad, I guess? 😉
Hiking between the 5th & 6th Station of the Subashiri Trail
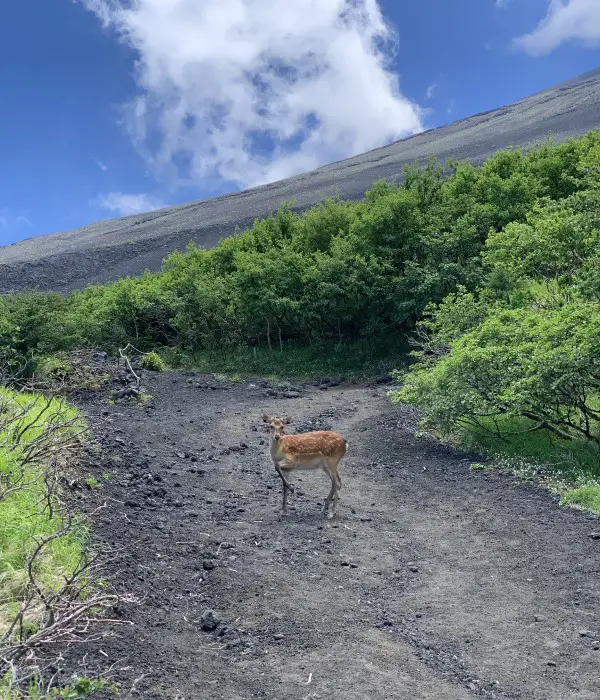
Meeting a wild deer
It took me another 30 minutes to reach the Original 6th Station at 2,700m. To my surprise, my Japanese came in handy again. I stopped to help a friendly American family explain the details of their reservation to a hut’s employee. If I hadn’t spent so much time there making sure they had a place to stay, I would have missed the most captivating moment of my entire hike…
While waiting for the family to come out of the hut and confirm that everything was fine, a beautiful deer appeared on the path behind the hut. Considering how commercialized climbing Mount Fuji is (there are vending machines at the top) and how crowded the trails are (thousands of people climb Mount Fuji every day), encountering a wild animal on the trail was something completely unexpected and magical!
meeting a sacred messenger of gods
The deer gazed at me for several minutes and even greeted me, as you should in Japan, with a series of bows. In case you are not aware, in Japan, according to Shinto beliefs, deer are considered sacred messengers of the gods. I wonder what that deer was trying to tell me. Perhaps something like: “Welcome back! Good to see you again”:)? Any doubts I still had about climbing (my doctor hadn’t given me the green light, as according to him, my knee was still too weak after the surgery) vanished after meeting this beautiful and graceful wild creature. Mount Fuji felt like home, more than ever.
Between the 6th and 7th Stations of the Subashiri Trail
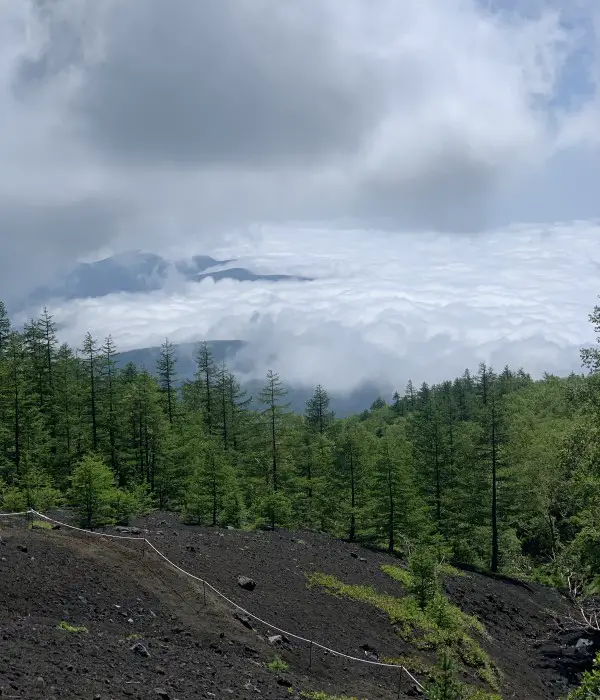
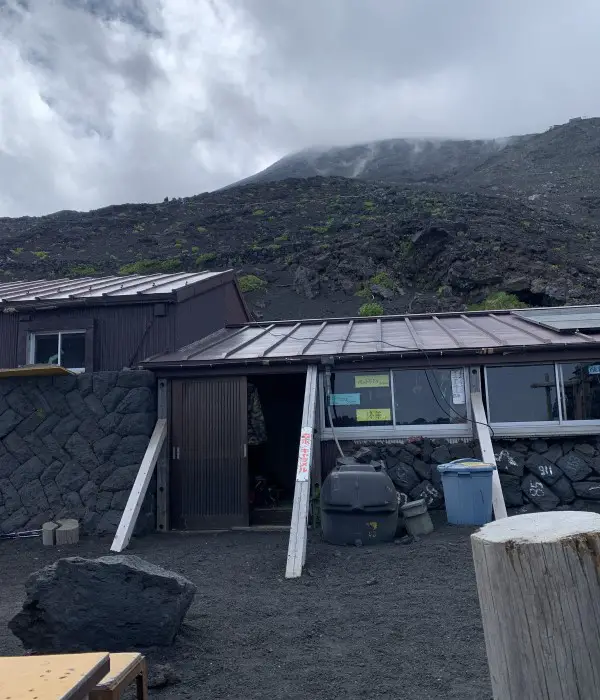
Once you pass the Original 6th Station, there are not many trees left. Shrubs also gradually become sparser. Only small, sun- and water-hungry plants stick out between the rocks. It took me an hour to reach the 7th Station (3090 m), I only met a handful of people. Compared to my ascent via the Yoshida Trail last year, this part of the route was more peaceful.
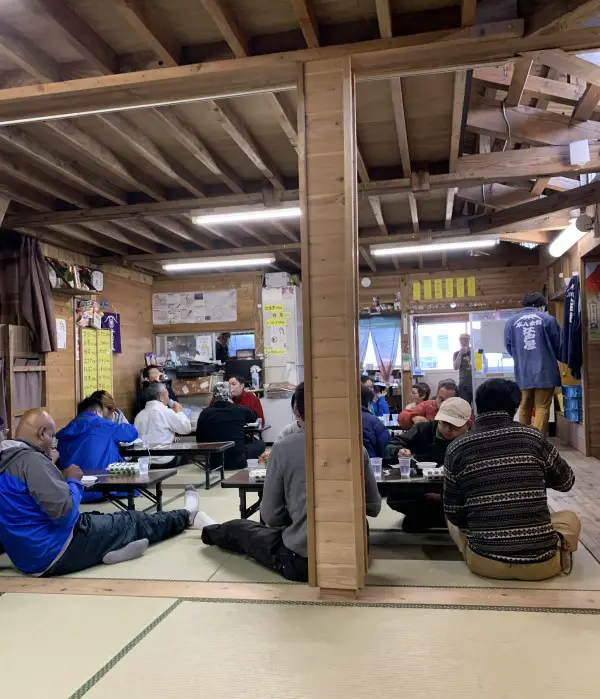
I sat in front of one of the huts and, admiring the views, ate my first onigiri, a Japanese rice ball. It was high time, I was already above 3000m! Even if you buy something to eat or drink at the hut, you are unlikely to be able to eat it inside if you are not an overnight guest. Due to the very limited space, you simply won’t be let in. However, compared to last year, when I saw numerous notes stuck to the door clearly stating “no entry due to the spread of the COVID-19 virus”, the overall atmosphere in the huts felt more inviting.
Nevertheless, the weather during my climb was amazing, so I didn’t have to seek shelter in the hut, but could enjoy the fresh air outdoors.
Climbing from the 6th to the 7th Station of the Subashiri Trail
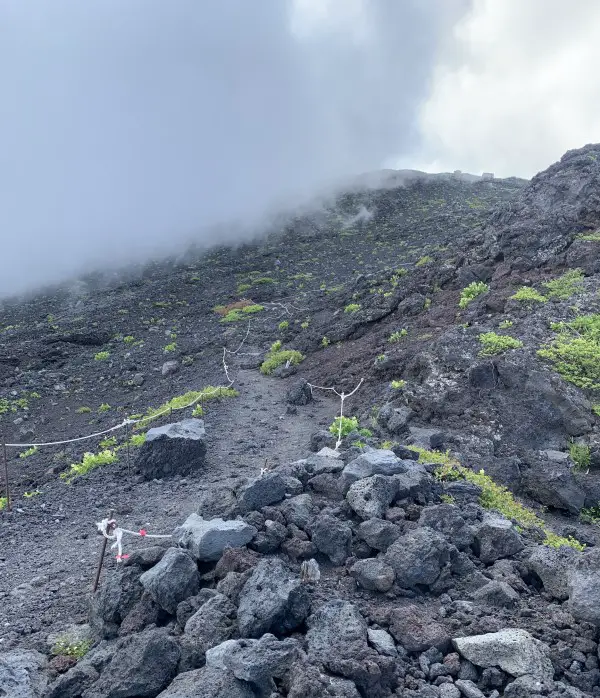
The last part of the hike
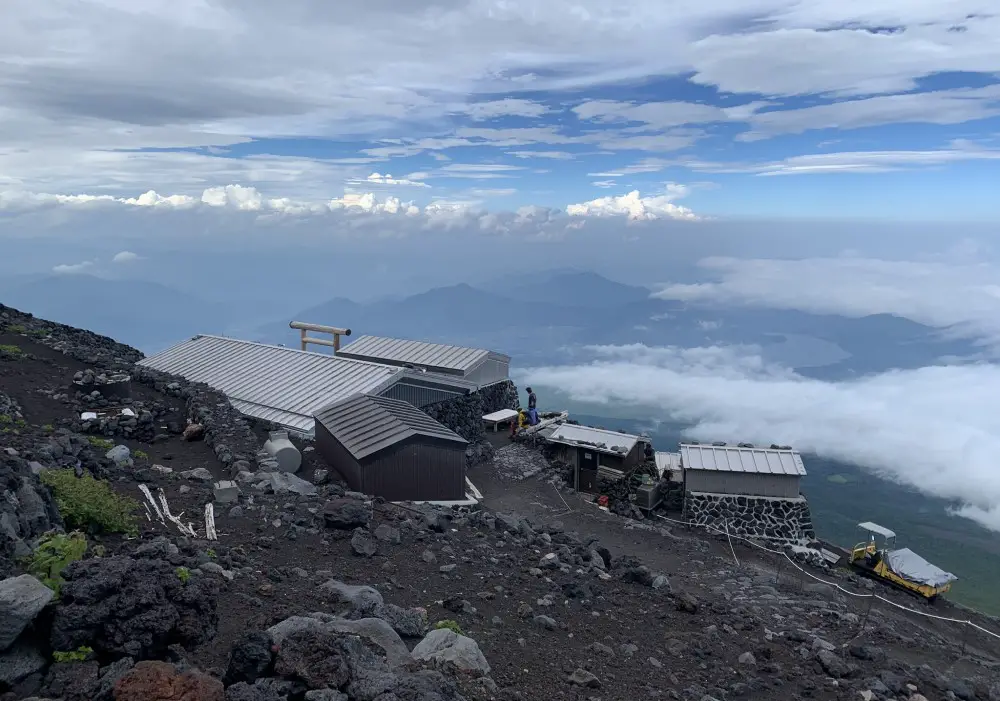
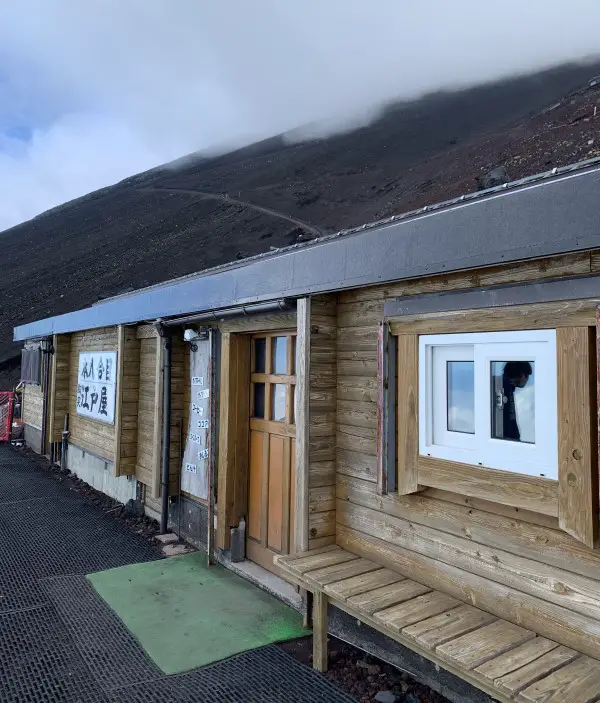
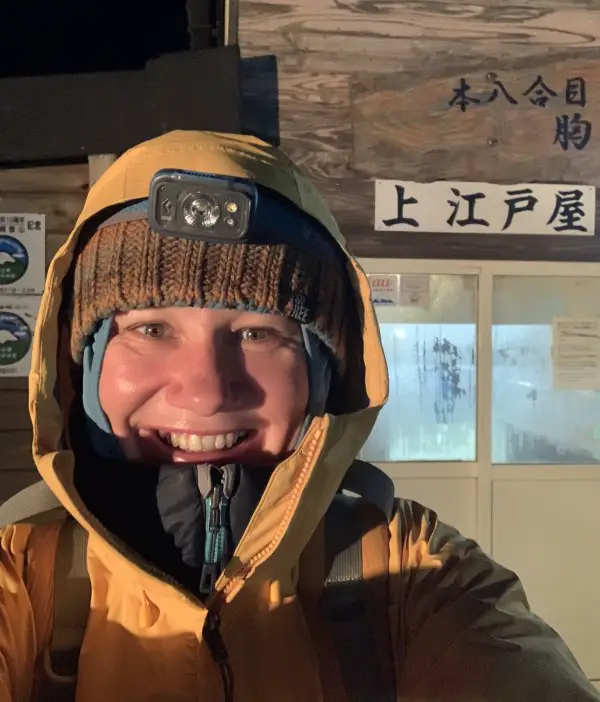
Climbing to the Original 8th Station at 3,400m was the last part of my hike today. It was there, in the Ue-Edoya hut precisely, that I was to spend the night. The last 300-metre ascent took me almost two hours. Not only did I feel more tired and hence the slower pace, but I just didn’t feel like rushing. I wanted to savour every moment. I’m not sure if I will ever return to Mount Fuji again, so I wished this moment would last longer..
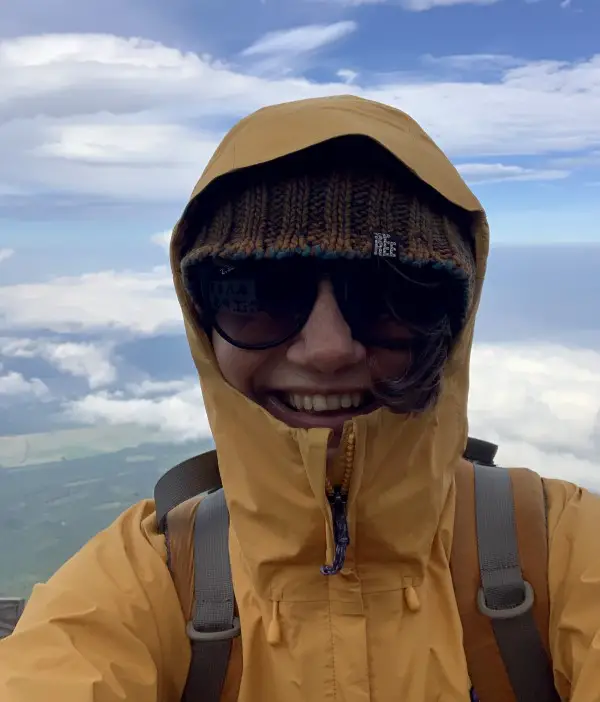
As the altitude increased, it became much colder, and the wind grew stronger. I began the climb wearing only a tank top and shorts, but now I had on my long-sleeve shirt, windproof jacket, leggings, and a beanie. Be sure to bring a few extra layers with you for the climb. It’s going to get cold!
Read about my Mount Fuji complete packing list here:
Compared to the hut I stayed on Mount Fuji the previous year (Ganso-Muro at 3,250m), Ue-Edoya felt cosier. Perhaps I only got this impression because when I entered the hut I wasn’t wet with rain like last time? Or maybe because it was the first day of the season, and the staff in the hut wasn’t tired of tourists yet and nicer. Who knows?
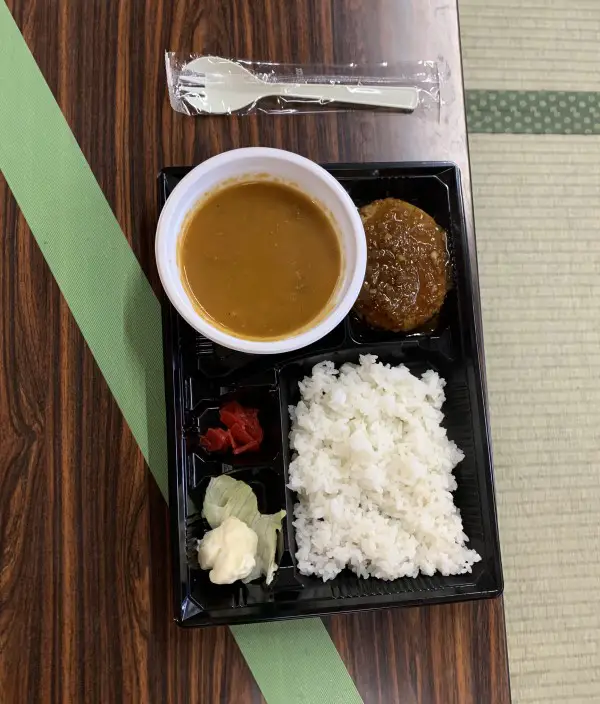
Generally, all the huts on Mount Fuji are quite similar. This time, I paid only for the night (JPY 8300) and didn’t opt for the standard dinner since it was a meat dish, and I try to avoid eating meat. When making your online booking, you need to specify whether you want dinner and/or breakfast included (at an additional cost, of course). I could have ordered the vegetable udon soup that I saw on the menu on the wall in the hut, but honestly, I was content with my rice balls.
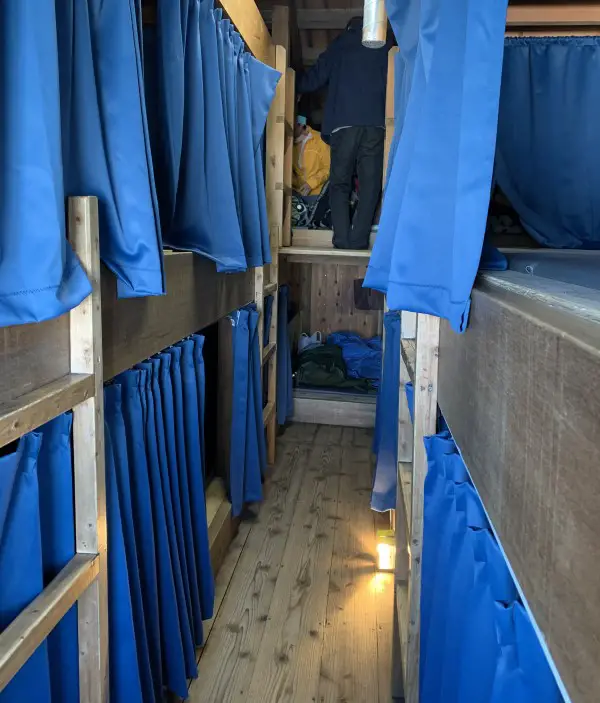
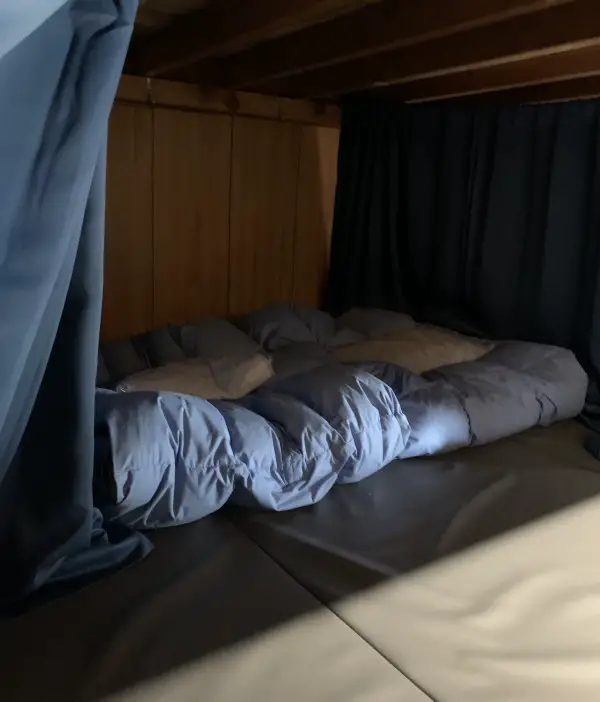
Since I was hiking alone, I had the rare chance to sleep close to a complete stranger, who turned out to be a very petite and quiet Korean lady who didn’t speak English. She hardly moved at night, and when I woke up, she was already gone. A perfect night companion on Mount Fuji. By the way, in a mountain hut in Japan, solo women hiking solo are never placed between men and vice versa.
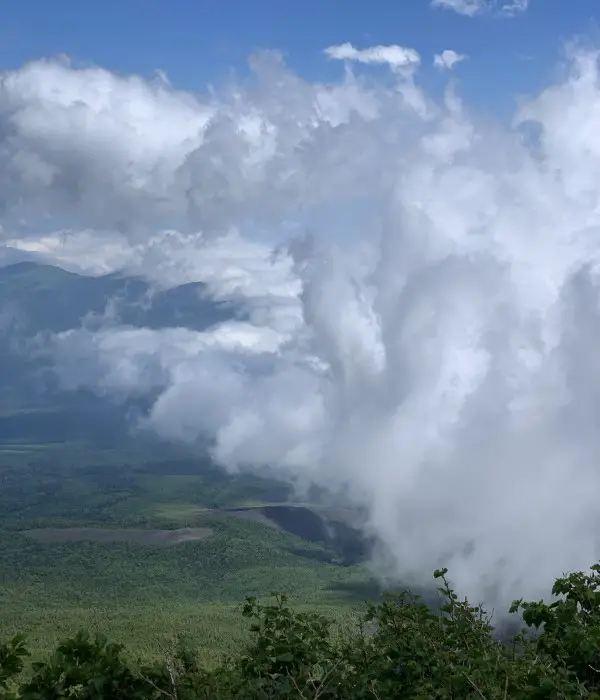
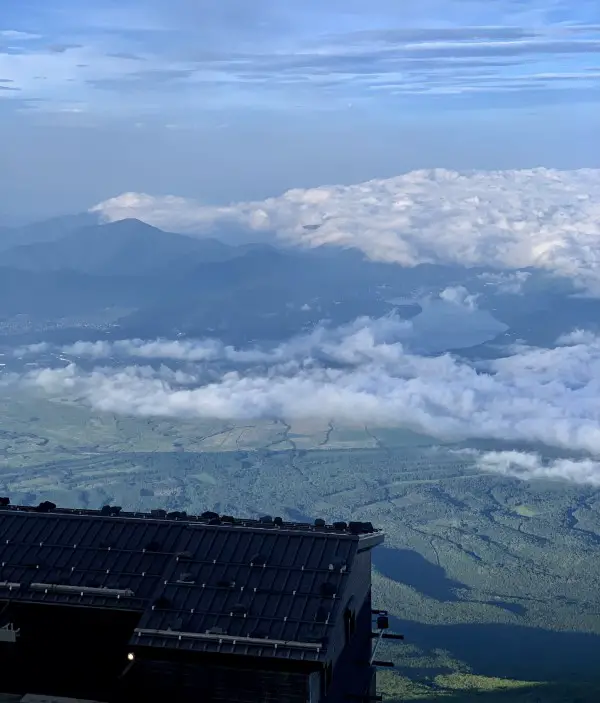
Overnight above the clouds - at the 8th Station
DAY 2. Sunrise hike: 8th Station (3,400m) > Mount Fuji’s summit (3,776m); and descending via the Prince Route > 5th Fujinomiya Station (2,400m
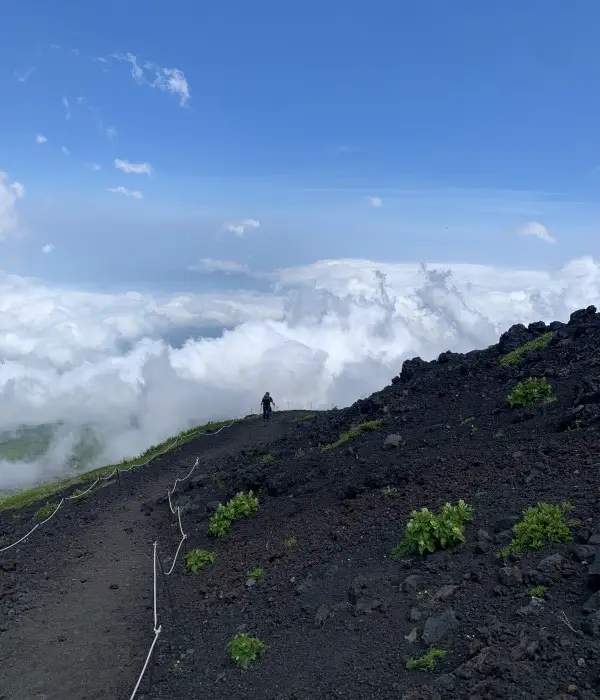
Sunrise hike to Mount Fuji’s summit
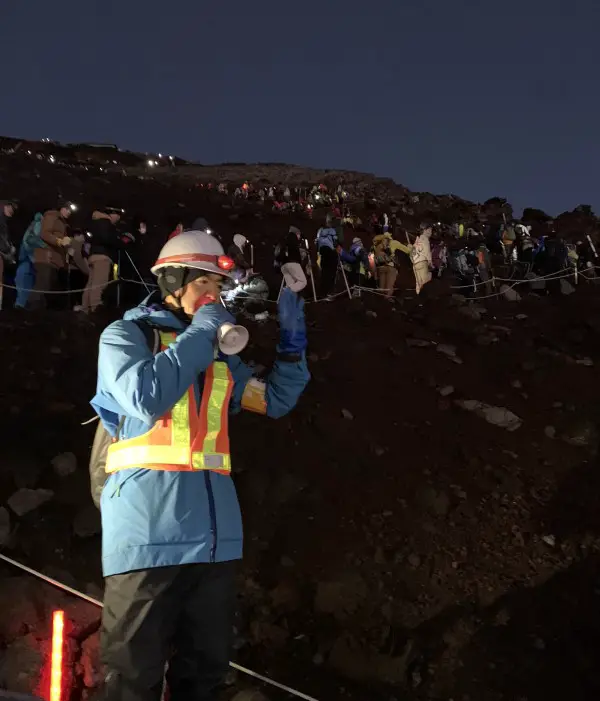
I set my alarm for 2:45, and by 3:15 I was in front of the hut with my headlamp on, ready for a sunrise hike. I knew it shouldn’t take me more than 80 minutes to reach the top. Sunrise was at 4:30. If you manage to secure a spot in one of the huts at the 8th Station (3,200 m and above), you will have to climb for a maximum of 2 hours in the morning, which is very nice.
My pace was quite fast, so I passed plenty of exhausted people who were hiking from the bottom at night, without resting overnight at a mountain hut. To be honest, if you can’t secure a spot at the 7th Station or higher, I suggest skipping the summit sunrise experience, getting enough sleep, and climbing Mount Fuji during the day.
Almost there!
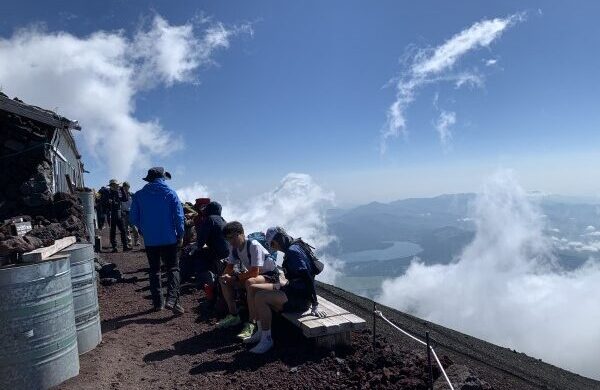
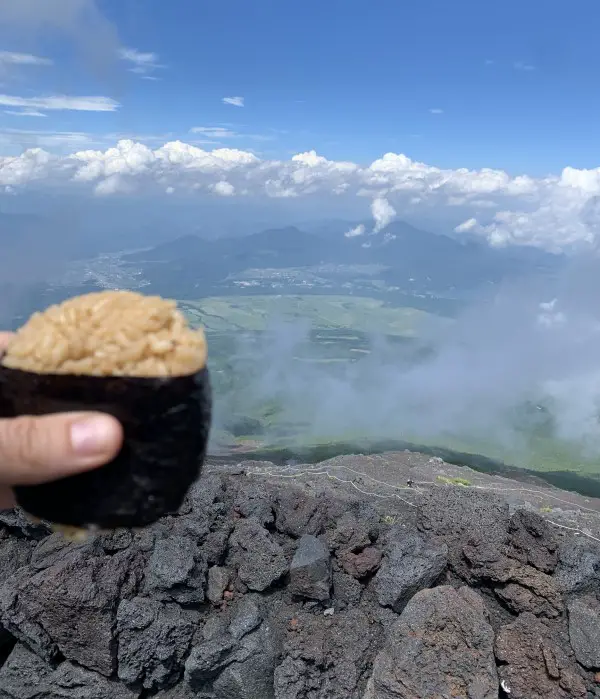
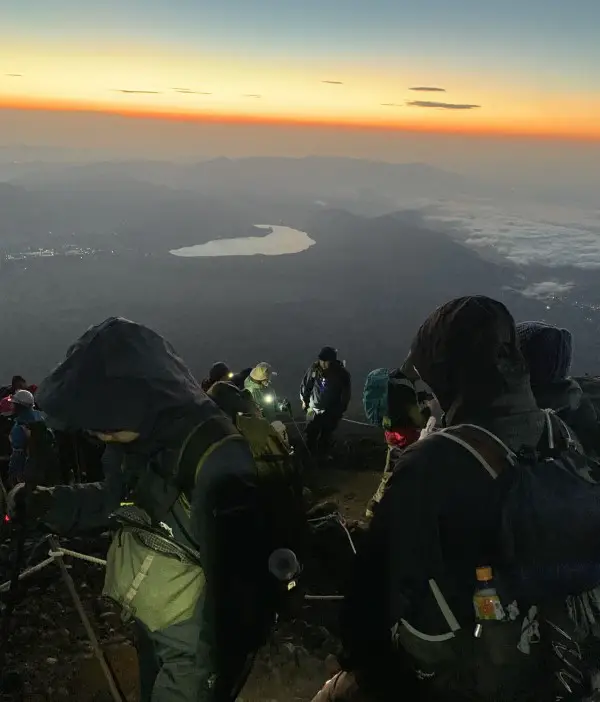
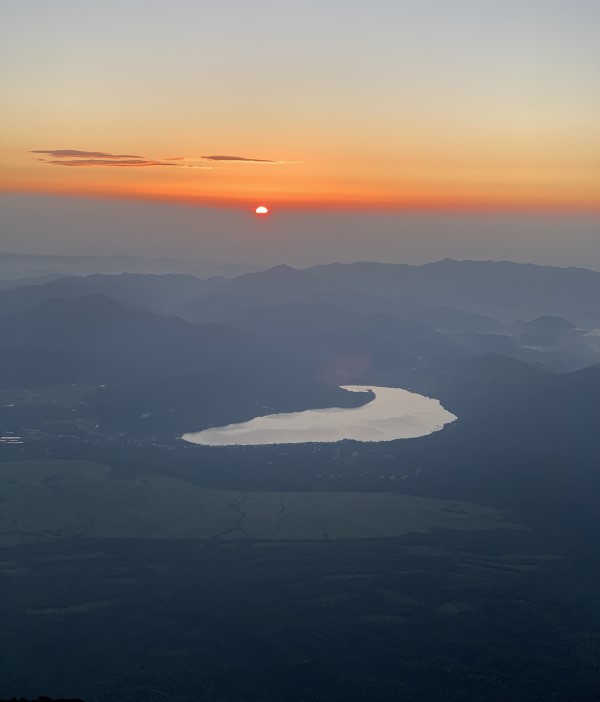
Mount Fuji’s famous sunrise: goraiko
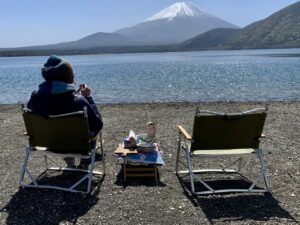
I reached the top just in time for sunrise. The sun was about to rise above the horizon, and the sky was nearly cloudless, offering a crystal-clear view of Yamanakako Lake below.
It felt so good to be here again. The mountain itself, of course, remained unchanged, but the sunrise was completely different compared to my previous climb. Not only was I alone this time, but I had probably changed over the last year. As the old saying goes, ‘You can’t step into the same river twice’. There is really something about it…
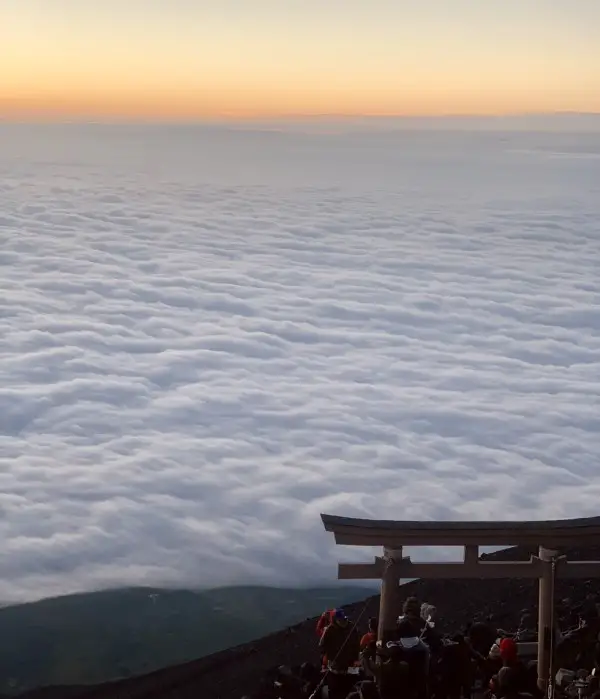
This year's cloudless sunrise vs. last year's sea of clouds from the top of Mount Fuji
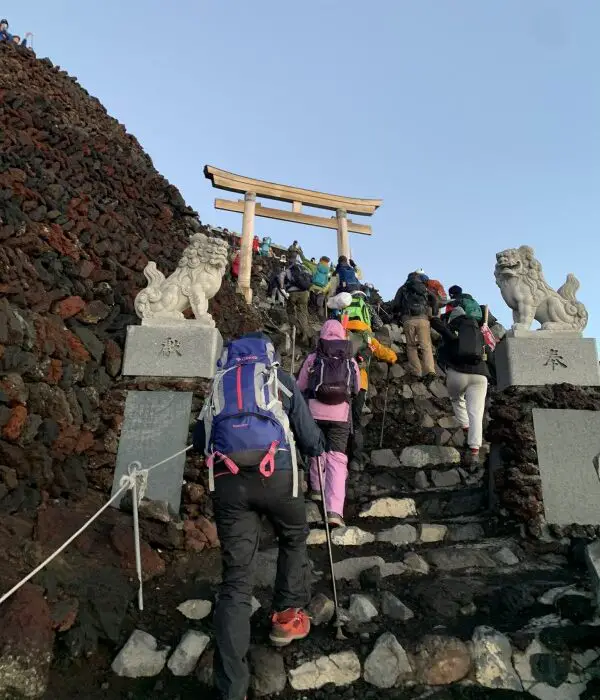
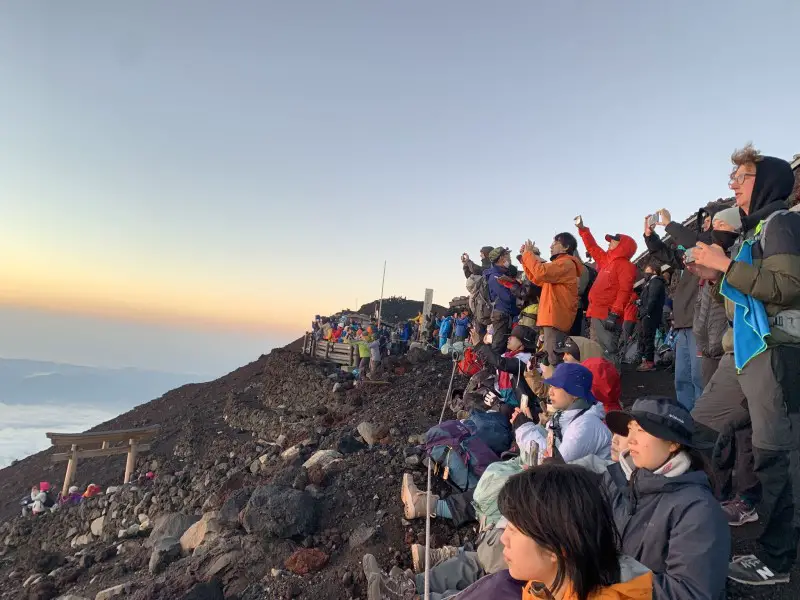
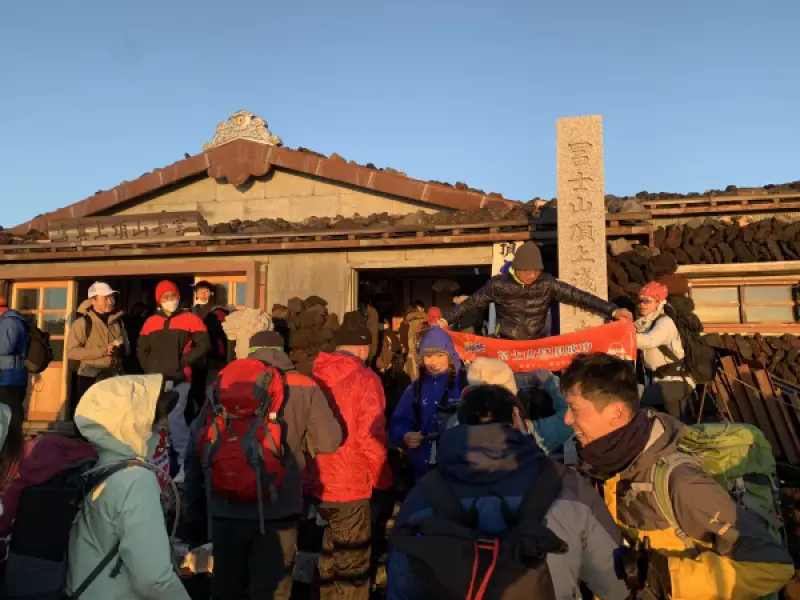
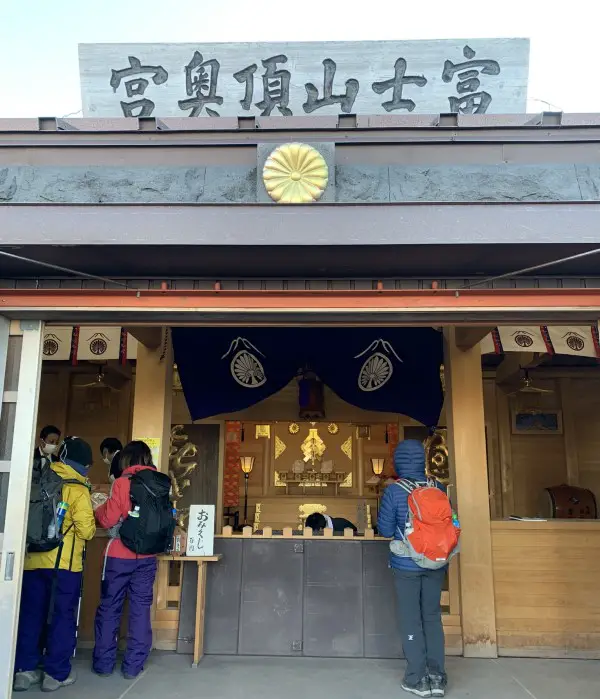
Even though Japan’s borders had opened and foreign tourists were finally able to climb Mount Fuji, the summit didn’t seem significantly more crowded than in the previous year. Probably because July is generally a less popular month among the Japanese hikers. Although the number of tourists at the summit was similar, this time there was a more festive atmosphere. Both the shrine and the gift shop were open. Life on the top of Mount Fuji has returned to normal.
Mount Fuji's summit...
Not so crowded means... still crowded 🙂
Walk around the crater and why I’m writing this blog
After sunrise, I headed towards Mount Fuji’s crater. I walked the last part of the 3-kilometre crater summit loop that I hadn’t been to before. Last year I turned right, passed the highest point, Kengamine Point, and descended the Gotemba Trail. This time I took a shortcut and turned left.
Soon after I met a Japanese man sitting on a rock and shivering from the cold. From his clothes – a leather jacket and lightweight sneakers – it was clear that he was not prepared. He had climbed Mount Fuji overnight without resting and was now exhausted. I offered him some of my hand warmers, which he accepted with a shy smile, as well as an energy bar, which he declined. Seeing such miserably-looking people in such beautiful natural surroundings is my main motivation for writing this blog…
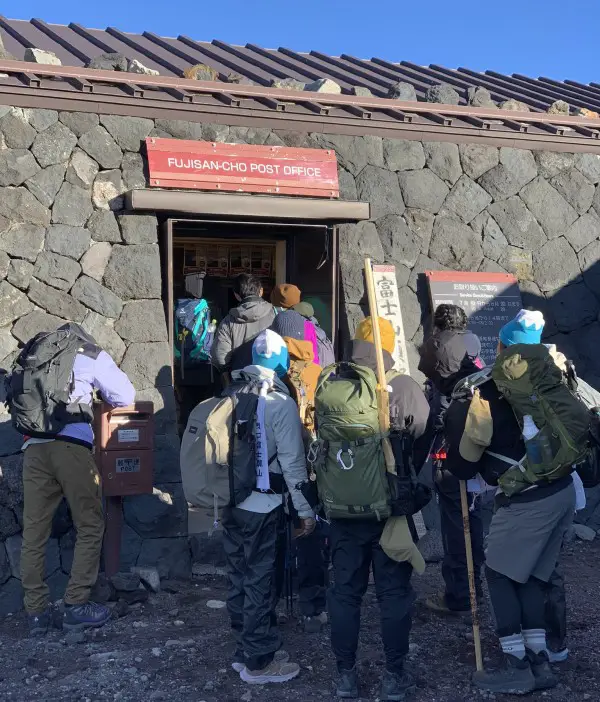
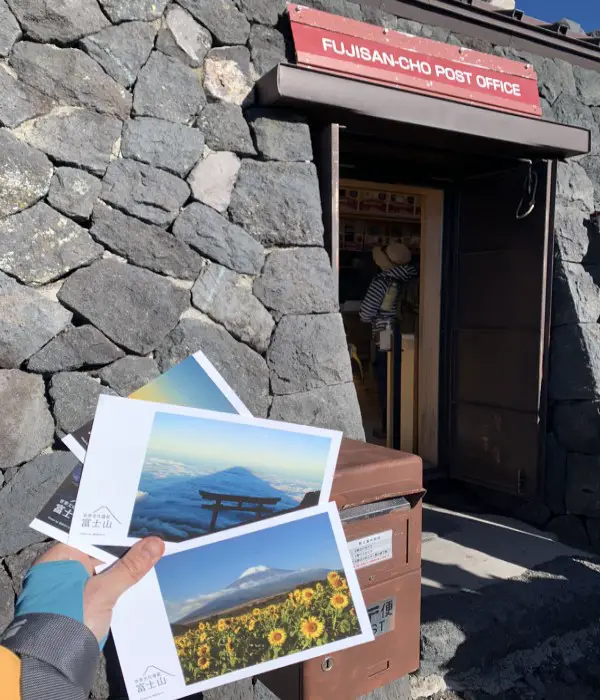
I reached the post office (yes, there is one at the top of Mount Fuji) just before it opened at 6:00. Despite the long queue, I decided to wait so I could purchase and send postcards. The post office had been closed on my two previous ascents.
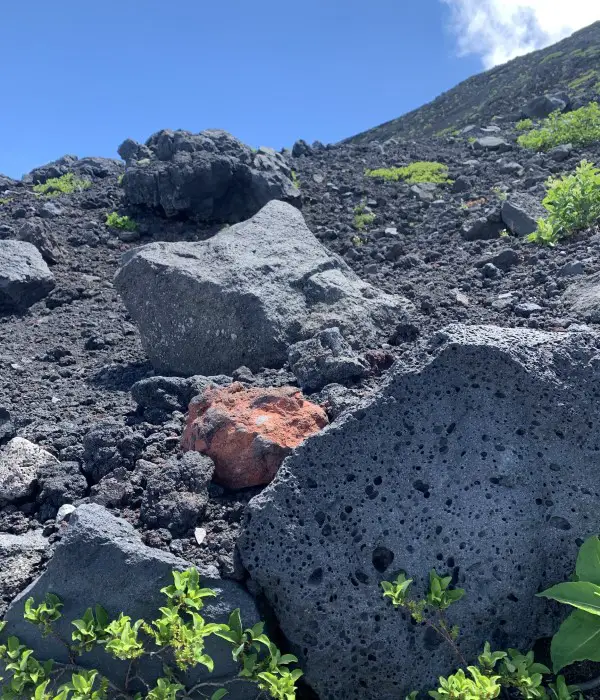
Mount Fuji is not just a big pile of rocks. It's a Big pile of rocks with a huge crater, shrines & post office 😉
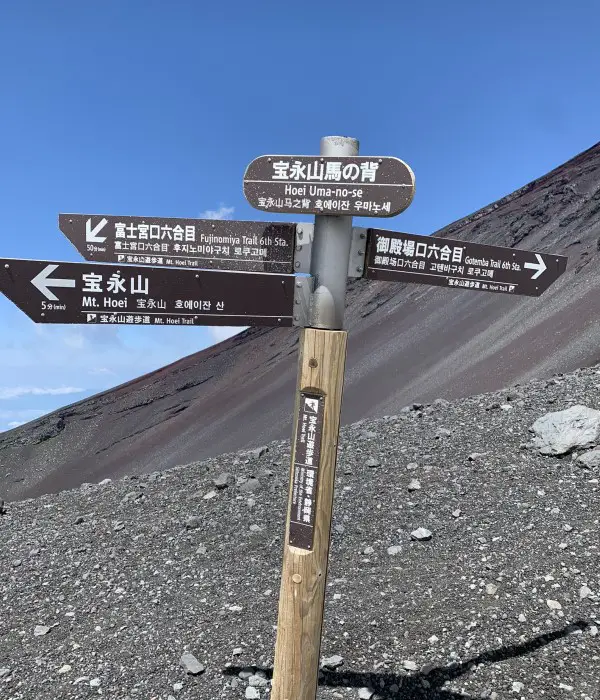
Time to descend via the Prince Route
After writing postcards and enjoying two cups of steaming hot black coffee around 7:20, I finally started my descent. I didn’t realize how quickly time had passed. Time flies very quickly on the roof of Japan!
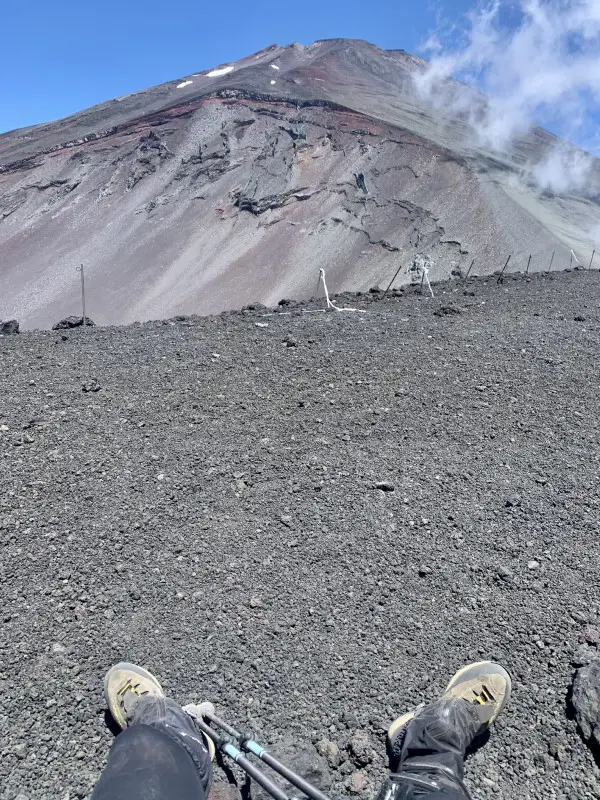
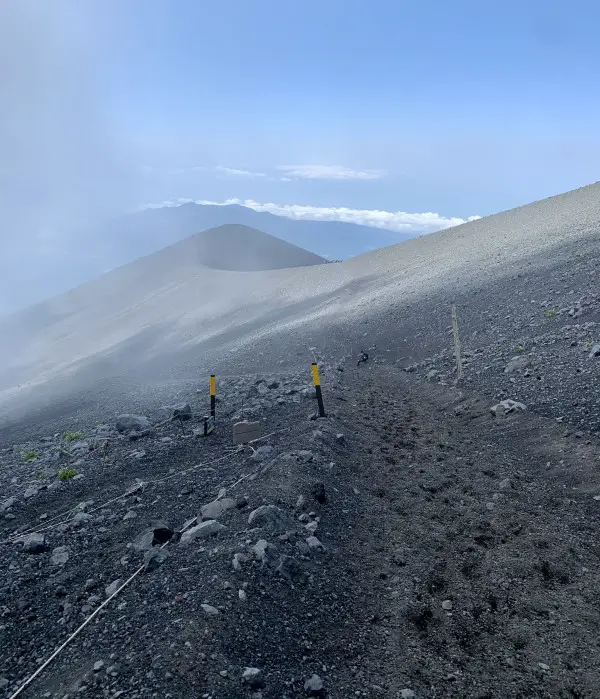
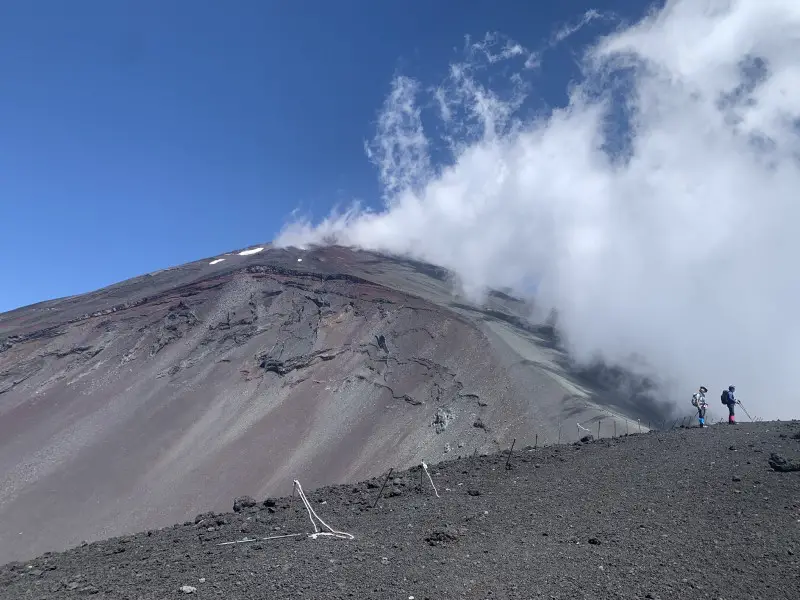
The initial part of the Prince Route, at the descent, coincides with the Gotemba route, which I took last year. The descent is relatively easy. It is less steep and less crowded. The views along the way are truly stunning. By the time I reached the trail leading to the top of Mount Hōei, I couldn’t help but run down the volcanic gravel path, just like I did last year. Well, maybe a little slower this time – because of my knee.
Mount Hōei - Mount Fuji's younger brother sitting on its slope
The hike from Mount Fuji to Hōei Crater took about 3 hours (including breaks). This time I decided to take a 5-minute detour to the top of Mount Hōei (2,693 m) to get to know the youngest crater of Mount Fuji better. The wind was strong, but the views were amazing!
There were only two Japanese ladies at the top of Mount Hōei, and they quickly left after I arrived. I had the entire majesty of Mount Fuji to myself. These are the moments worth living for.
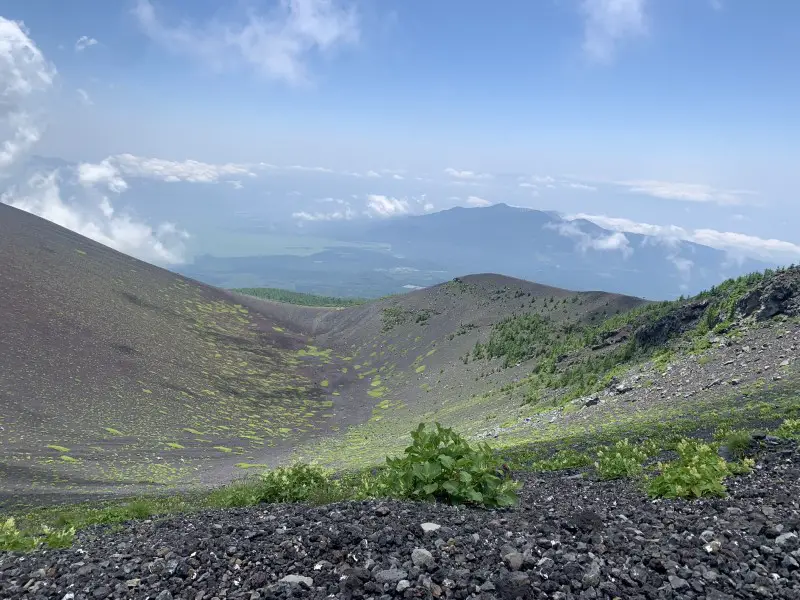
After 30 minutes I was at the First Crater Rim of Hōei, at 2,420m. From this point, I could see the vast crater of Hōei as well as the mighty peak of Mount Fuji.
Mount Fuji's summit from the top of Mount Hōei
The crater of Mount Hōei
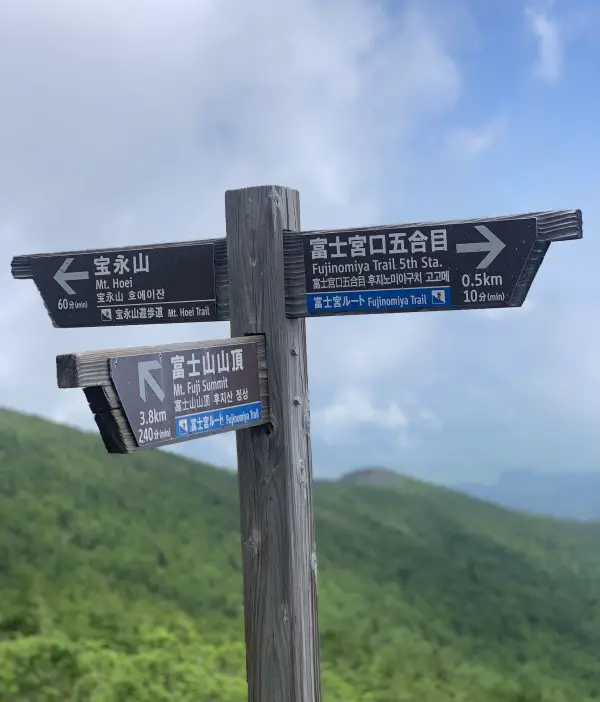
I’d be lying if I said I wasn’t tired. The final part of the descent was difficult. Even though I knew I was very close to the 5th Station, there was a little uphill ahead of me before reaching the Fujinomiya Trail, which I wasn’t particularly happy about. I just wanted to go down, not up! Actually, I just wanted to sit or lie down 🙂
Fujinomiya 5th Station
Oh how nice it was to finally see the blue Fujinomiya Trail markers. Without stopping, I passed the two huts at the 6th Station and reached my destination, the 5th station, at 11:30.
The next bus to Shin-Fuji train station was leaving at 1:00 PM. I had plenty of time to rest, change since it was much warmer down there, eat some of my leftover snacks, and explore Fujinomiya 5th Station. To my surprise, there are not only luggage lockers, but also a small gear rental where you could even rent trekking boots.
The End!
If I were to give you one last piece of advice, get in line for the bus early to get a seat. After a long climb, the last thing you want is to stand on the bus for almost two hours.
Hi, your blog is so informative and well written. 🙂
We are planning to follow your advise to ascend via the shibashiri trail and descend via the prince route, just to understand if the trail markers are very obvious (I hope we do not get lost). My friends have ascended via Yoshida n descended via Yoshiba before, so it’s all our first time doing the shibashiri trail. Most likely our luggage will be at Gotemba station (at locker or the hotel). Do you have any advice how we can get back to Gotemba station from Fuji 5th station? Thanks!
Thank you for your good words about my writing 🙂 I’m so glad you decided to take a less travelled route. I’m sure, you are going to love it. It is really impossible to get lost on Mount Fuji in hiking season. There are plenty of trail markers indicating the route clearly. You just need to have some common sense, as usual when you head to the mountains or in general when travelling to a new place.
If you want to go back from 5th Fujinomiya Station to Gotemba Station with public transportation, you might have to first reach the 5th Gotemba Station and from there, head to Gotemba Station. Some information about travelling between 5th Stations: https://www.fujisan-climb.jp/en/access/travel-between-trailheads.html
But if you want an honest opinion, if you don’t have a budget for taxi, I wouldn’t recommend travelling by bus from Fujinomiya 5th Station to Gotemba Station. It seems too tiring /long to me. The last thing you want after 2 day climbing is to spend so much time in buses. Plus, buses from Gotemba 5th Station are not so frequent, so it might take ages. If I were you, I would descend with Gotemba trail to Gotemba Station. It’s super fun! Although it is longer than Prince Route, it makes more sense to spend more time hiking and soaking in the beautiful views than in the buses.
If none of those options convince you, how about sending your luggage to a next location and descend with the Prince Route without worrying about your luggage? Your hotel might have such service. It is very common in Japan, cheap & reliable. Or there is always Yamamoto luggage forwarding services.
Good luck with planning & climbing Fujisan!
Ps. Before moving to Japan I used to live 6 years in Singapore <3
We will reconsider the descend path again since after researching, getting from Fujinomiya 5th station to Gotemba does seem to take a very long journey by public transport. Any idea if it’s hard to get taxi?
I saw some comments Shibashiri trail is with more big boulders as compared to Yoshida, does it make this trail more difficult?
It’s quite easy to get a taxi at 5th stations, so don’t worry. We caught it easily at the 5th Station of Gotemba. I haven’t noticed and difference between Yoshida & Subashiri trail when it comes to terrain. To me they seem the same! Hope it helps.
An 11:30PM finish would indeed be an exhausting day!
Due to huts on the Yoshida trail being quite difficult to get, I’m now considering Subashiri. Your photos of the bed arrangement are helpful…I’ll be traveling with kids, so I wanted to avoid the people-stepping-over-each-other rooms, but the photos you showed has them semi-private (at least with curtains). How many sleepers would you have within one divider?
Comparing the Yoshida and Subashiri, I know Subashiri is longer due to it starting about 300m lower than Yoshida…besides that, how would you compare the difficulty between the two?
That would be a nightmare! 😉 Thanks for pointing my typo out, already corrected.
The Subashiri Trail is not more difficult than Yoshida. The type of terrain / rocks is the same, it’s not more steep. It’s just longer only because it starts 300m lower.
Although the Subashiri Trail is longer I found it more relaxing because of the initial part in the forest and as there were much less people. However, this year it will be probably a bit more crowded due to the new restrictions. Said that, go for it! If you can’t get a hut at Yoshida, it’s actually a good thing, you can explore much nicer Subashiri.
There are usually 2 people within one divider. Curtains make it quite nice and private. Of course it won’t be the most comfortable night in your life, but I think it’s just a part of the adventure and since we are in Japan, everything is kept clean, private & comfortable as much as it is possible at this altitude.
Hi Beti,
Thanks for your detailed trail and hiking report. I would like to know the bus schedule between Subashiri 5th Station and Gotemba station, could you let me know the bus schedule.?And also if I start from Tokyo, what is the best choice I can do in order to get Gotemba as soon and as conveniently as possible. Thanks a lot! I am leaving US for Tokyo Narita in less than 48 hours.
David
As for your 2nd question, it depends from where exactly in Tokyo. You can depart either from Shinjuku or Tokyo stations by train or bus. Here are some options but use Google Maps to check the most convenient transportation for you based on your location and departure time. Google Maps works great in Japan!
1) Tokyo Station:
a) Direct bus ~2hours (if no traffic).
b) Train with a transfer at Shinjuku or Kozu. There are different options, so check Google Maps for details ~2-2,5 hours
2) Shinjuku Station:
a) Direct bus, 1hour 45 min (if no traffic). You can get the tickets here: https://odakyu-highway.jp/express/hakone/
b) Direct Romancecar train, ~1h 35 min. Get tickets here: https://www.web-odakyu.com/e-romancecar/?language=en&country=
Get the bus tickets or Romancecar train tickets before. Use google chrome to translate Japanese sites.
Ideally it’s best to spend a night in Gotemba and start early from there, if that’s possible.
Hi Beti, I took your suggestion this August and ascended the Subashiri route and descended via the Prince route. Thank you so much! I loved that the ascent was easier for the trees, that the descent easier because of the ash trail, and that both featured such different terrain! The Subashiri going up was like hiking an ancient forest into more and more bare mountain top, whereas the Gotemba+Mount Hoei was almost like an alien planet!
This blog-post was super helpful. I’ve only climbed once, but am confident recommending the same route to any of my friends looking to climb! Thanks!
Hey Tom, thank you for your comment! It means so much, especially as more people turn to AI for travel tips. I’m really glad you enjoyed the Subashiri-Prince Route. Couldn’t agree more – the natural diversity of this trail combo really lets you experience so many sides of Mount Fuji. You’ve climbed it once, but you definitely did it the right way! 😉
Hello Beti my family and I are doing the same trail with a tour company June 30 2025, question with the walking sticks do you know if all stations are open at that time for the stamps?
Thank you for your kind words, and well done on choosing this beautiful trail!
As far as I know, all stations, shops, and facilities on the Mount Fuji trails are closed until July, so you won’t be able to get a walking stick or stamps. That said, you’ll get to enjoy Mount Fuji without a walking stick, stamps, and—most importantly—crowds! And that’s far better than climbing with all three.
Beti, this is an awesome blog post! Having the detailed description of the actual hike combined with the photos gives me a feeling of what to expect and makes me more comfortable with the adventure. Although the advice in other blogs are useful, the detailed narrative is confidence inspiring.
One quick question: Is there a reason you stopped at the 8th hut rather than proceeding to 8.5 or 9th. I’m not a morning person so less hiking in morning darkness is appealing to me.
Hi Howard, thank you for such a nice comment. I’m so glad you find my writing useful. As for your question: mountain huts spots are limited so it is not always easy to book a night at 8.5 / 9th station, and you might end up staying at 8th or even 7th station. But it is not a bad solution at all, sometimes it might be wiser to sleep at a lower altitude because of the easier acclimatisation. Hope it answers your question. Let me know if you have some other doubts!
Very well written article, I was wondering if you could help me tho. we are planning to come from Canada and are booking a tour for a two day climb. the big thing for my son and I are to get the walking sticks and stamps. I know when the season starts but this tour is June 30th. My question is do you know or how can I find out about the stations that do the stamps being open at that time? I would not want to miss a stamp because a station closed.
Thank you for your kind words, and well done on choosing this beautiful trail!
As far as I know, all stations, shops, and facilities on the Mount Fuji trails are closed until July, so you won’t be able to get a walking stick or stamps. That said, you’ll get to enjoy Mount Fuji without a walking stick, stamps, and—most importantly—crowds! And that’s far better than climbing with all three.
Thank you for the helpful information.
The Prince Route sounds like fun. Is that a trail of loose soil/gravel? How did you avoid stumbling, twisting your ankle, or causing a sandslide?
Hi Juliana, thank you for visiting my blog and leaving a mark. Every time someone does it, I feel like my long hours of writing are not a total waste of time 😉 Yes, Prince Route is partially made of loose soil, and.. in general Mount Fuji is just one big pile of rocks and gravel. Watching your every step, maintaining a suitable walking pace—no rush—and wearing good hiking boots are probably the secret. No magic or special skills. Just focus and good boots.
Hi Beti – Your article deserves a comment and helped unlock a route that I know we are going to love!
I had a question as well. The climbing season ends Sep 10 and we are getting a hut on the Subashiri trail, 7th station on Sep 10. We plan to summit early in the morning on the 11th. Will we be able to descend on Sep 11 morning via the Prince route? What is confusing me is the official website which says only Yoshida trail will be open for Sep 11 descent https://www.fujisan-climb.jp/en/climbing-season/when-to-go-index.html
Hi Sudeep! Thank you for your kind words. It makes me happy you liked my writing 🙂
Yeah, the way it’s written might be a bit confusing. I believe they added that note specifically for the Yoshida Trail, since it’s the only one that—starting this year—has a gate at the 5th Station to enforce the daily limit of 4,000 climbers on this most popular route. So I think they simply meant that the gate will still be open on September 11th. The other trails don’t have gates, so there’s no issue with entering the mountain and getting out. Just make sure you have transportation arranged to get to your next destination. That said, I’d hope the buses to run as usual until the 11th.
In this route, you explore the ridge of Mt. Hoei without going down into the crater, but the ridge itself is the most spectacular part, so it’s well worth it. Also, if you ascend via the Subashiri Trail—which also starts from the Gotemba side—it’s more convenient to return to your starting point (for example, to pick up your luggage).
Thank you! I’ve read quite a few guides and yours is the best IMO. We are going to take your exact route (18 Aug-19 Aug 2025, which is a Monday to Tuesday, so hopefully a little bit less busy than the weekend). Two questions:
1. Is it really obvious which is the ‘Prince route’ when we are coming down?
2. We are two adults, and (against your recommendation, ugh, sorry) we’re traveling from Tokyo first thing in the morning on the 18th to Subashiri. Cost wise, do you think buses+trains for two people one way from Tokyo would be about the same as just taking a taxi from our hotel in Tokyo to Subashiri 5th Station (which according to google will be around $200 one way). In terms of mental energy, I figured a door to door taxi might be worth the splurge. Thank you for your insights!
ahhhhhhhh thank you <3
1. Yes, it’s easy especially after reading my blog 😉 The trails are clearly marked. Just take the Gotemba Trail (green) from the summit, and at some point, turn right toward Mt. Hoei (you really can’t miss it). Descend to the crater and follow the signs for the Fujinomiya Trail (blue). You can also download the Organic Maps app for offline navigation—it’s super handy.
2.You do what you can 🙂 Trains and buses are definitely cheaper, but if you can splurge a bit—go for it! Life’s short, you’ve just landed in Tokyo and are about to climb Mount Fuji. If not now, then when?
Just make sure you can find a taxi willing to take you all the way to the 5th Subashiri Station. Some people have managed it before, but I know that sometimes drivers in Japan either can’t or don’t want to leave their prefecture. You might also have to pay a return fee for the driver. I might be wrong though—I haven’t done it myself—so hopefully it’s straightforward!
Hi Beti, could you please recommened a mountain guide in Japan who can lead from ascending at 5th Sabashiri Station and ascend via Prince Route and end at Fujinomiya 5th station?
Hi Yvonne, I’ve done all my summer Mount Fuji climbs without a guide, so I’m sorry, but I don’t have any recommendations. However, I believe there are plenty available online. Enjoy Fujisan, and thank you for reading my blog — in times when AI is taking over the world, it really means a lot to me.
Love your write up! My husband and 16 year old daughter are hoping to start the climb July 3rd this year. I believe our only option is Yoshida as it looks like the other trails don’t open until July 10th. I will try to book Ue-Edoya Hut, though they haven’t updated the registration opening dates for this year yet. Thanks so much for sharing!
Thank you for your comment and for reading my blog in the age of AI 😉. I’m sorry for the late reply, but the last two months have been quite hectic. It’s peak tourist season in Japan, and since I run off-the-beaten-path tours, I’ve been constantly on the go. On top of that, I traveled to Nepal ❤️.
I have some good news for you: unlike in previous years, the Subashiri Trail is scheduled to open on July 1 this year (instead of July 10)!
Thank you for the detailed and informative article. I’m considering the shibashiri trail as the hut for the Yoshida trails are not available. How would compare the difficulty/steep level of shibashiri to Yoshida?
Hi Kelly,
Thank you for your kind words and for reading my blog. I’m sorry for the late reply, but the last two months have been quite hectic. It’s peak tourist season in Japan, and since I run off-the-beaten-path tours, I’ve been constantly on the go. On top of that, I traveled to Nepal ❤️
I wrote about the difficulty of the different Mount Fuji trails here: https://betifulworld.com/100-things-about-climbing-mount-fuji/
Please check sections 17–30. Personally, I think climbing via the Subashiri Trail is much nicer than the Yoshida Trail. It’s less crowded, more scenic, and feels a bit more adventurous.
Good luck with your Fuji climb!


Hi, your blog is so informative and well written. 🙂
We are planning to follow your advise to ascend via the shibashiri trail and descend via the prince route, just to understand if the trail markers are very obvious (I hope we do not get lost). My friends have ascended via Yoshida n descended via Yoshiba before, so it’s all our first time doing the shibashiri trail. Most likely our luggage will be at Gotemba station (at locker or the hotel). Do you have any advice how we can get back to Gotemba station from Fuji 5th station? Thanks!
Regards, Ching Ling (from Singapore)
Hi Ching Ling!
Thank you for your good words about my writing 🙂 I’m so glad you decided to take a less travelled route. I’m sure, you are going to love it. It is really impossible to get lost on Mount Fuji in hiking season. There are plenty of trail markers indicating the route clearly. You just need to have some common sense, as usual when you head to the mountains or in general when travelling to a new place.
If you want to go back from 5th Fujinomiya Station to Gotemba Station with public transportation, you might have to first reach the 5th Gotemba Station and from there, head to Gotemba Station. Some information about travelling between 5th Stations: https://www.fujisan-climb.jp/en/access/travel-between-trailheads.html
But if you want an honest opinion, if you don’t have a budget for taxi, I wouldn’t recommend travelling by bus from Fujinomiya 5th Station to Gotemba Station. It seems too tiring /long to me. The last thing you want after 2 day climbing is to spend so much time in buses. Plus, buses from Gotemba 5th Station are not so frequent, so it might take ages. If I were you, I would descend with Gotemba trail to Gotemba Station. It’s super fun! Although it is longer than Prince Route, it makes more sense to spend more time hiking and soaking in the beautiful views than in the buses.
I describe my descend via the Gotemba Trail in this blog post: https://betifulworld.com/climbing-mount-fuji-from-the-bottom-the-yoshida-trail/
If none of those options convince you, how about sending your luggage to a next location and descend with the Prince Route without worrying about your luggage? Your hotel might have such service. It is very common in Japan, cheap & reliable. Or there is always Yamamoto luggage forwarding services.
Good luck with planning & climbing Fujisan!
Ps. Before moving to Japan I used to live 6 years in Singapore <3
Thanks! Yup I read that u used to work in Sg :D.
We will reconsider the descend path again since after researching, getting from Fujinomiya 5th station to Gotemba does seem to take a very long journey by public transport. Any idea if it’s hard to get taxi?
I saw some comments Shibashiri trail is with more big boulders as compared to Yoshida, does it make this trail more difficult?
May I also know for your
It’s quite easy to get a taxi at 5th stations, so don’t worry. We caught it easily at the 5th Station of Gotemba. I haven’t noticed and difference between Yoshida & Subashiri trail when it comes to terrain. To me they seem the same! Hope it helps.
Hi Beti, I saw what I hope is just a typo:
FINISH | 5th STATION | 2,400m | 11:30 PM
An 11:30PM finish would indeed be an exhausting day!
Due to huts on the Yoshida trail being quite difficult to get, I’m now considering Subashiri. Your photos of the bed arrangement are helpful…I’ll be traveling with kids, so I wanted to avoid the people-stepping-over-each-other rooms, but the photos you showed has them semi-private (at least with curtains). How many sleepers would you have within one divider?
Comparing the Yoshida and Subashiri, I know Subashiri is longer due to it starting about 300m lower than Yoshida…besides that, how would you compare the difficulty between the two?
Hi Tim!
That would be a nightmare! 😉 Thanks for pointing my typo out, already corrected.
The Subashiri Trail is not more difficult than Yoshida. The type of terrain / rocks is the same, it’s not more steep. It’s just longer only because it starts 300m lower.
Although the Subashiri Trail is longer I found it more relaxing because of the initial part in the forest and as there were much less people. However, this year it will be probably a bit more crowded due to the new restrictions. Said that, go for it! If you can’t get a hut at Yoshida, it’s actually a good thing, you can explore much nicer Subashiri.
There are usually 2 people within one divider. Curtains make it quite nice and private. Of course it won’t be the most comfortable night in your life, but I think it’s just a part of the adventure and since we are in Japan, everything is kept clean, private & comfortable as much as it is possible at this altitude.
Hope it helps! Good luck!
Beti
Hi Beti,
Thanks for your detailed trail and hiking report. I would like to know the bus schedule between Subashiri 5th Station and Gotemba station, could you let me know the bus schedule.?And also if I start from Tokyo, what is the best choice I can do in order to get Gotemba as soon and as conveniently as possible. Thanks a lot! I am leaving US for Tokyo Narita in less than 48 hours.
David
Hi David!
Bus schedule between Subashiri 5th Station & Gotemba station: https://www.japan-guide.com/bus/fuji_season.html
As for your 2nd question, it depends from where exactly in Tokyo. You can depart either from Shinjuku or Tokyo stations by train or bus. Here are some options but use Google Maps to check the most convenient transportation for you based on your location and departure time. Google Maps works great in Japan!
1) Tokyo Station:
a) Direct bus ~2hours (if no traffic).
b) Train with a transfer at Shinjuku or Kozu. There are different options, so check Google Maps for details ~2-2,5 hours
2) Shinjuku Station:
a) Direct bus, 1hour 45 min (if no traffic). You can get the tickets here: https://odakyu-highway.jp/express/hakone/
b) Direct Romancecar train, ~1h 35 min. Get tickets here: https://www.web-odakyu.com/e-romancecar/?language=en&country=
Get the bus tickets or Romancecar train tickets before. Use google chrome to translate Japanese sites.
Ideally it’s best to spend a night in Gotemba and start early from there, if that’s possible.
Good luck with the weather and happy hiking!
Beti
Very nice write up. Thank you! After reading your blog, I want to climb Mt. Fuji even more, and now, I also know you can do it solo.
Hi Beti, I took your suggestion this August and ascended the Subashiri route and descended via the Prince route. Thank you so much! I loved that the ascent was easier for the trees, that the descent easier because of the ash trail, and that both featured such different terrain! The Subashiri going up was like hiking an ancient forest into more and more bare mountain top, whereas the Gotemba+Mount Hoei was almost like an alien planet!
This blog-post was super helpful. I’ve only climbed once, but am confident recommending the same route to any of my friends looking to climb! Thanks!
Hey Tom, thank you for your comment! It means so much, especially as more people turn to AI for travel tips. I’m really glad you enjoyed the Subashiri-Prince Route. Couldn’t agree more – the natural diversity of this trail combo really lets you experience so many sides of Mount Fuji. You’ve climbed it once, but you definitely did it the right way! 😉
Hello Beti my family and I are doing the same trail with a tour company June 30 2025, question with the walking sticks do you know if all stations are open at that time for the stamps?
Hi Duane,
Thank you for your kind words, and well done on choosing this beautiful trail!
As far as I know, all stations, shops, and facilities on the Mount Fuji trails are closed until July, so you won’t be able to get a walking stick or stamps. That said, you’ll get to enjoy Mount Fuji without a walking stick, stamps, and—most importantly—crowds! And that’s far better than climbing with all three.
Enjoy your hike!
Beti, this is an awesome blog post! Having the detailed description of the actual hike combined with the photos gives me a feeling of what to expect and makes me more comfortable with the adventure. Although the advice in other blogs are useful, the detailed narrative is confidence inspiring.
One quick question: Is there a reason you stopped at the 8th hut rather than proceeding to 8.5 or 9th. I’m not a morning person so less hiking in morning darkness is appealing to me.
Hi Howard, thank you for such a nice comment. I’m so glad you find my writing useful. As for your question: mountain huts spots are limited so it is not always easy to book a night at 8.5 / 9th station, and you might end up staying at 8th or even 7th station. But it is not a bad solution at all, sometimes it might be wiser to sleep at a lower altitude because of the easier acclimatisation. Hope it answers your question. Let me know if you have some other doubts!
Very well written article, I was wondering if you could help me tho. we are planning to come from Canada and are booking a tour for a two day climb. the big thing for my son and I are to get the walking sticks and stamps. I know when the season starts but this tour is June 30th. My question is do you know or how can I find out about the stations that do the stamps being open at that time? I would not want to miss a stamp because a station closed.
Duane McNirney
Hi Duane,
Thank you for your kind words, and well done on choosing this beautiful trail!
As far as I know, all stations, shops, and facilities on the Mount Fuji trails are closed until July, so you won’t be able to get a walking stick or stamps. That said, you’ll get to enjoy Mount Fuji without a walking stick, stamps, and—most importantly—crowds! And that’s far better than climbing with all three.
Enjoy your hike!
Thank you for the helpful information.
The Prince Route sounds like fun. Is that a trail of loose soil/gravel? How did you avoid stumbling, twisting your ankle, or causing a sandslide?
Hi Juliana, thank you for visiting my blog and leaving a mark. Every time someone does it, I feel like my long hours of writing are not a total waste of time 😉 Yes, Prince Route is partially made of loose soil, and.. in general Mount Fuji is just one big pile of rocks and gravel. Watching your every step, maintaining a suitable walking pace—no rush—and wearing good hiking boots are probably the secret. No magic or special skills. Just focus and good boots.
Hi Beti – Your article deserves a comment and helped unlock a route that I know we are going to love!
I had a question as well. The climbing season ends Sep 10 and we are getting a hut on the Subashiri trail, 7th station on Sep 10. We plan to summit early in the morning on the 11th. Will we be able to descend on Sep 11 morning via the Prince route? What is confusing me is the official website which says only Yoshida trail will be open for Sep 11 descent https://www.fujisan-climb.jp/en/climbing-season/when-to-go-index.html
Hi Sudeep! Thank you for your kind words. It makes me happy you liked my writing 🙂
Yeah, the way it’s written might be a bit confusing. I believe they added that note specifically for the Yoshida Trail, since it’s the only one that—starting this year—has a gate at the 5th Station to enforce the daily limit of 4,000 climbers on this most popular route. So I think they simply meant that the gate will still be open on September 11th. The other trails don’t have gates, so there’s no issue with entering the mountain and getting out. Just make sure you have transportation arranged to get to your next destination. That said, I’d hope the buses to run as usual until the 11th.
One other question… is it not possible to Gotemba 5th station from Mt hoei? So basically rejoining the descent trail?
Not only is it possible, it’s actually a great idea. After reaching the top of Mt. Hoei, you can easily return to the Gotemba Trail. That’s exactly what I did once—you can read about it here: https://betifulworld.com/climbing-mount-fuji-from-the-bottom-the-yoshida-trail/.
In this route, you explore the ridge of Mt. Hoei without going down into the crater, but the ridge itself is the most spectacular part, so it’s well worth it. Also, if you ascend via the Subashiri Trail—which also starts from the Gotemba side—it’s more convenient to return to your starting point (for example, to pick up your luggage).
Hope it helps. Happy hiking!
Thank you! I’ve read quite a few guides and yours is the best IMO. We are going to take your exact route (18 Aug-19 Aug 2025, which is a Monday to Tuesday, so hopefully a little bit less busy than the weekend). Two questions:
1. Is it really obvious which is the ‘Prince route’ when we are coming down?
2. We are two adults, and (against your recommendation, ugh, sorry) we’re traveling from Tokyo first thing in the morning on the 18th to Subashiri. Cost wise, do you think buses+trains for two people one way from Tokyo would be about the same as just taking a taxi from our hotel in Tokyo to Subashiri 5th Station (which according to google will be around $200 one way). In terms of mental energy, I figured a door to door taxi might be worth the splurge. Thank you for your insights!
ahhhhhhhh thank you <3
1. Yes, it’s easy especially after reading my blog 😉 The trails are clearly marked. Just take the Gotemba Trail (green) from the summit, and at some point, turn right toward Mt. Hoei (you really can’t miss it). Descend to the crater and follow the signs for the Fujinomiya Trail (blue). You can also download the Organic Maps app for offline navigation—it’s super handy.
2.You do what you can 🙂 Trains and buses are definitely cheaper, but if you can splurge a bit—go for it! Life’s short, you’ve just landed in Tokyo and are about to climb Mount Fuji. If not now, then when?
Just make sure you can find a taxi willing to take you all the way to the 5th Subashiri Station. Some people have managed it before, but I know that sometimes drivers in Japan either can’t or don’t want to leave their prefecture. You might also have to pay a return fee for the driver. I might be wrong though—I haven’t done it myself—so hopefully it’s straightforward!
Hope it helps a bit. Good luck!
Thank you very much. Once again, very helpful!
Take care and wishing you all the best on your future adventures.
Hi Beti, could you please recommened a mountain guide in Japan who can lead from ascending at 5th Sabashiri Station and ascend via Prince Route and end at Fujinomiya 5th station?
Hi Yvonne, I’ve done all my summer Mount Fuji climbs without a guide, so I’m sorry, but I don’t have any recommendations. However, I believe there are plenty available online. Enjoy Fujisan, and thank you for reading my blog — in times when AI is taking over the world, it really means a lot to me.
Love your write up! My husband and 16 year old daughter are hoping to start the climb July 3rd this year. I believe our only option is Yoshida as it looks like the other trails don’t open until July 10th. I will try to book Ue-Edoya Hut, though they haven’t updated the registration opening dates for this year yet. Thanks so much for sharing!
Thank you for your comment and for reading my blog in the age of AI 😉. I’m sorry for the late reply, but the last two months have been quite hectic. It’s peak tourist season in Japan, and since I run off-the-beaten-path tours, I’ve been constantly on the go. On top of that, I traveled to Nepal ❤️.
I have some good news for you: unlike in previous years, the Subashiri Trail is scheduled to open on July 1 this year (instead of July 10)!
Good luck with your Fuji-san adventure! 🗻
Hi Beti,
Thank you for the detailed and informative article. I’m considering the shibashiri trail as the hut for the Yoshida trails are not available. How would compare the difficulty/steep level of shibashiri to Yoshida?
Thank you!
Hi Kelly,
Thank you for your kind words and for reading my blog. I’m sorry for the late reply, but the last two months have been quite hectic. It’s peak tourist season in Japan, and since I run off-the-beaten-path tours, I’ve been constantly on the go. On top of that, I traveled to Nepal ❤️
I wrote about the difficulty of the different Mount Fuji trails here: https://betifulworld.com/100-things-about-climbing-mount-fuji/
Please check sections 17–30. Personally, I think climbing via the Subashiri Trail is much nicer than the Yoshida Trail. It’s less crowded, more scenic, and feels a bit more adventurous.
Good luck with your Fuji climb!